https REALLY everywhere: AWS Private CA
07 May 2025 - 8 min. read
Andrea Pusineri

WordPress is the easiest way to manage and create content. Its flexibility is loved by authors: with a couple of plugins you can do everything from hosting a cute kittens photo gallery to hosting an e-commerce site.
Let’s face it: seen from the IT guy point of view, WordPress is a technical nightmare. When someone has to deal with it the horror begins: scalability is challenging, installation isn’t scripted and a LAMP stack is not always easy to maintain.
In this article we’ll give you some technical hints and examples to ease your relationship with WordPress in a cloud environment based on AWS.
We'll try to use as many AWS managed services as we can to be able to offload boring and dangerous tasks.
We want our database to be highly available and scalable, so obviously we’ll use Amazon Aurora with MySQL compatibility.
With Amazon Aurora we don’t have to worry about space usage because the underlying storage can automatically scale when needed. In addition, with point-in-time recovery you can restore your data with the granularity of a second.
You can also use Multi-AZ configurations with read replicas that can take over in case of an Availability Zone failure.
AWS will automatically assign a reader endpoint and a writer endpoint (with a DNS record) when you create an Amazon Aurora Cluster instance.
In case of a failure (or maintenance) the read replica will be automatically promoted to become the writer and the endpoint will be automatically updated: simply configure your wp-config.php file with the writer endpoint and AWS will do all the work for you.
If you know that your database will be stressed by a lot of read traffic you can add up to 15 read replicas to a single Aurora Cluster but you’ll need to tell WordPress to use them. In this case, you can take advantage of the hyperdb plugin: with hyperdb you can define as many database read replicas as you want in your configuration file and use them. The example configuration file is well documented; here’s an example configuration:
wpdb->add_database(array(
 'host'	=> mydbcluster.cluster-123456789012.us-east-1.rds.amazonaws.com,
 'user'	=> DB_USER,
 'password'	=> DB_PASSWORD,
  'name' 	=> DB_NAME,
));

$wpdb->add_database(array(
 'host' 	=> mydbcluster.cluster-ro-123456789012.us-east-1.rds.amazonaws.com,
 'user'	=> DB_USER,
 'password'	=> DB_PASSWORD,
 'name'	=> DB_NAME,
 'write'	=> 0,
 'read'	=> 1,
));
Instead, if you are starting small and don’t know how and when your site will need to scale, Aurora Serverless is the best choice for you: it has the ability to scale the compute layer and to “pause” if your website isn’t accessed, so you can also save money !
We want to take advantage of the elasticity of the cloud, so using EC2 and Autoscaling Groups can be the natural choice.Also, we can go further and use Docker containers with an ECS Fargate cluster with a little bit of application refactoring.
Using containers reduces maintenance activities for operating systems updates and makes scaling more easily. As a bonus point we can also automate the deployment workflow using pipelines.
WordPress offers a pre-built container image with a vanilla installation:
We can start building our docker image adapting it to our needs, installing plugins automatically using wp-cli: in our example we’ll install the wordpress-seo plugin (we’ll assume that you already have a working wp-config.php file)
Please note that this is only an example. We suggest you to tailor and customize your Dockerfile to your needs: we always recommend that you know what software you are using and running, especially in containerized solutions.
Example Dockerfile:
FROM wordpress

COPY wp-config.php /usr/src/wordpress/

RUN  curl -O https://raw.githubusercontent.com/wp-cli/builds/gh-pages/phar/wp-cli.phar && chmod +x wp-cli.phar && mv wp-cli.phar /usr/local/bin/wp

WORKDIR /usr/src/wordpress/

RUN wp --allow-root core update
RUN wp --allow-root plugin install wordpress-seo

WORKDIR /var/www/html
We just automated our installation, making it maintainable and ready for testing in different environments.
Simply run:
docker build . -t myawesomewordpresscontainer and you’ll have a ready-to-go container to deploy. You can use a docker-compose.yml file to test on your local pc, run it in a development environment or in production using ECS.
Creating a serverless execution environment on AWS ECS is pretty simple:
On AWS Console go to ECS -> Create Cluster, select “Networking Only” to define a Fargate Cluster:

Give it a name:

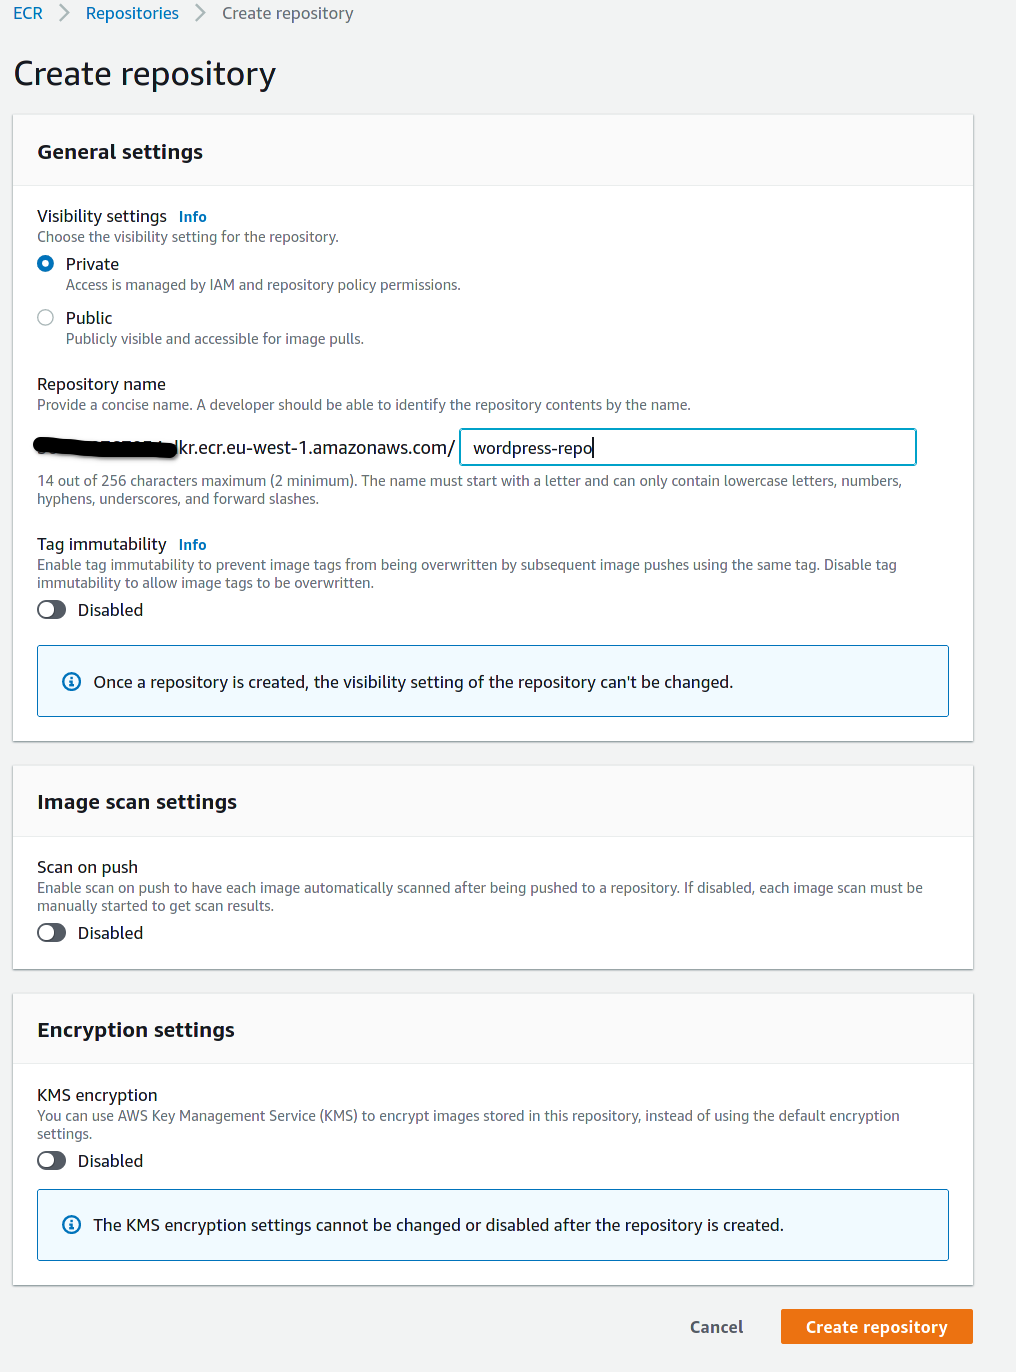
Create a Docker Repository for the image: Select “Amazon ECR -> Repositories
Click on the just created ECR repository by clicking on “View push commands” you’ll get ready-to-go instructions to build and upload the container to the repository:

Once image upload is done you can add a task definition for the ECS cluster,.he task definition will define how to run our container in the ECS cluster:
Click on “task-definitions” on the AWS Console sidebar and select “Create new Task Definition”:

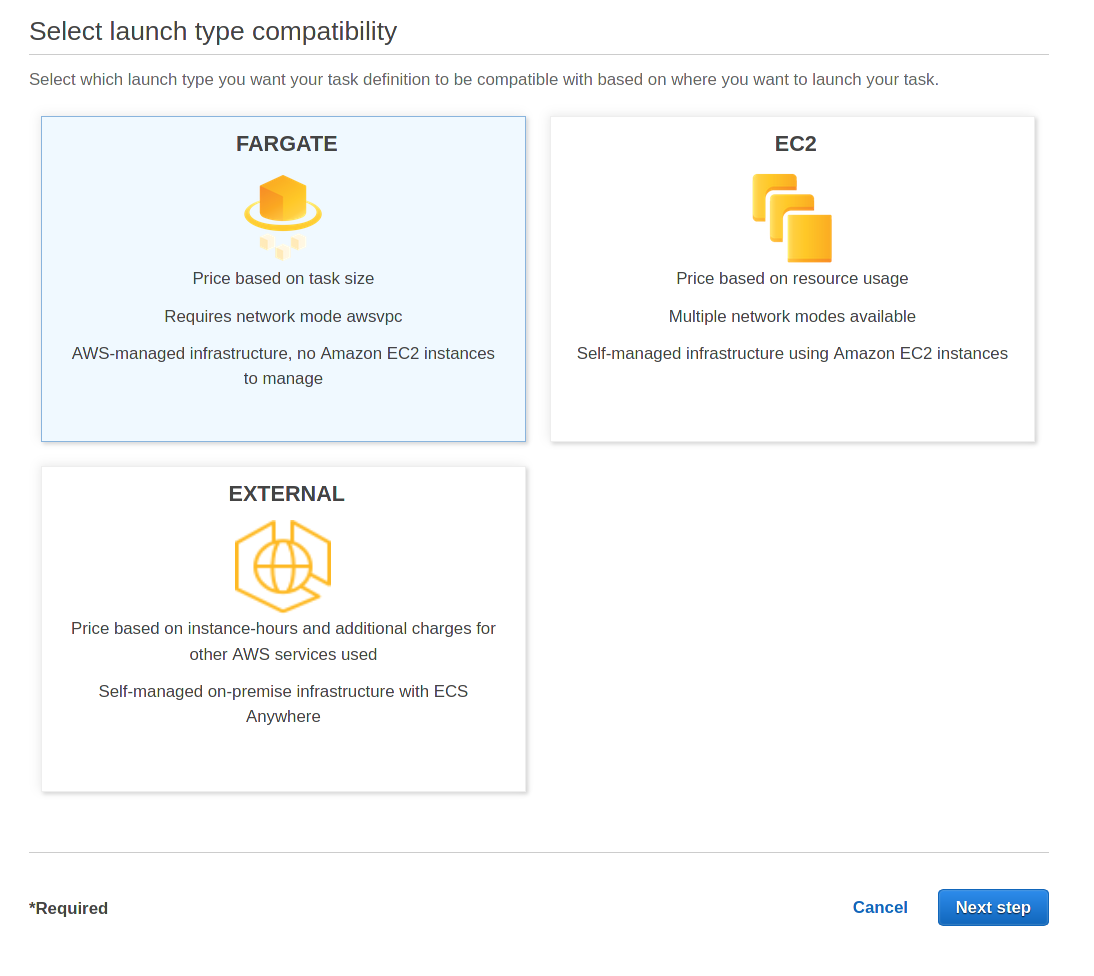
Select Fargate as launch type
Give the task definition a name and assign the resources.
Since we are developing a small demo we’ll select 0.25 CPU units and 0.5 GB of memory (keep also in mind that it is always better to scale horizontally having multiple small containers).
Click on “Add Container” to add the container definition, so we can specify everything for the Docker execution Environment
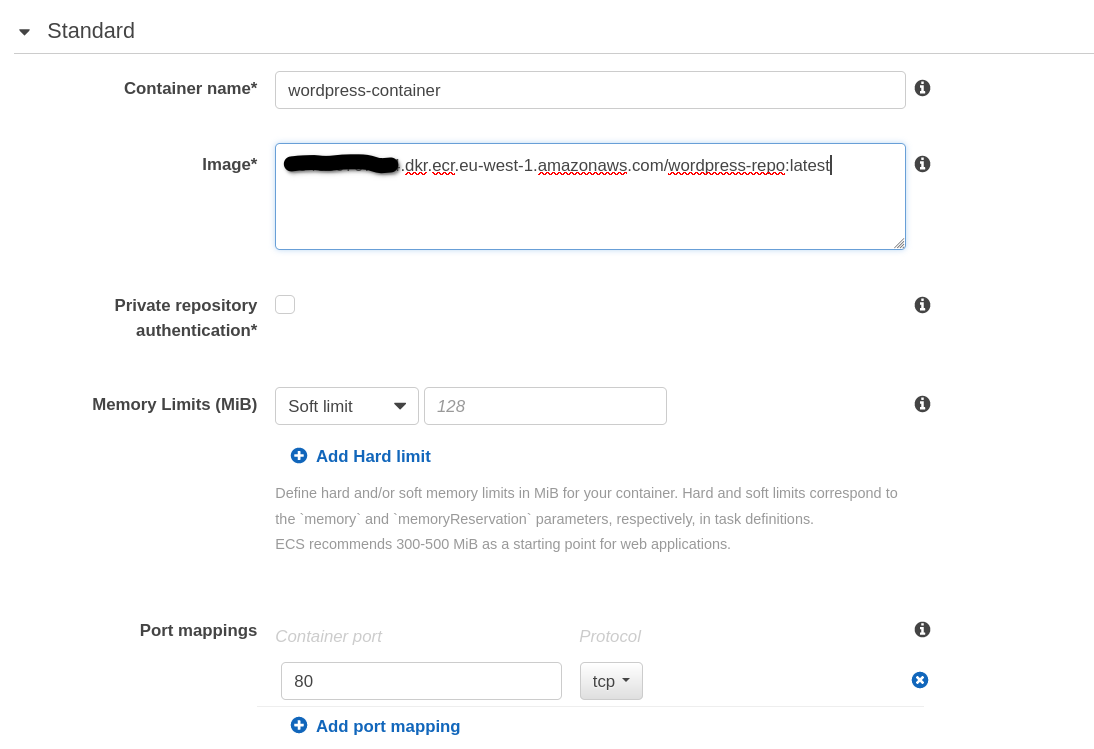
Don’t forget to map port 80!
After you create the task definition you can define a service to run the container:
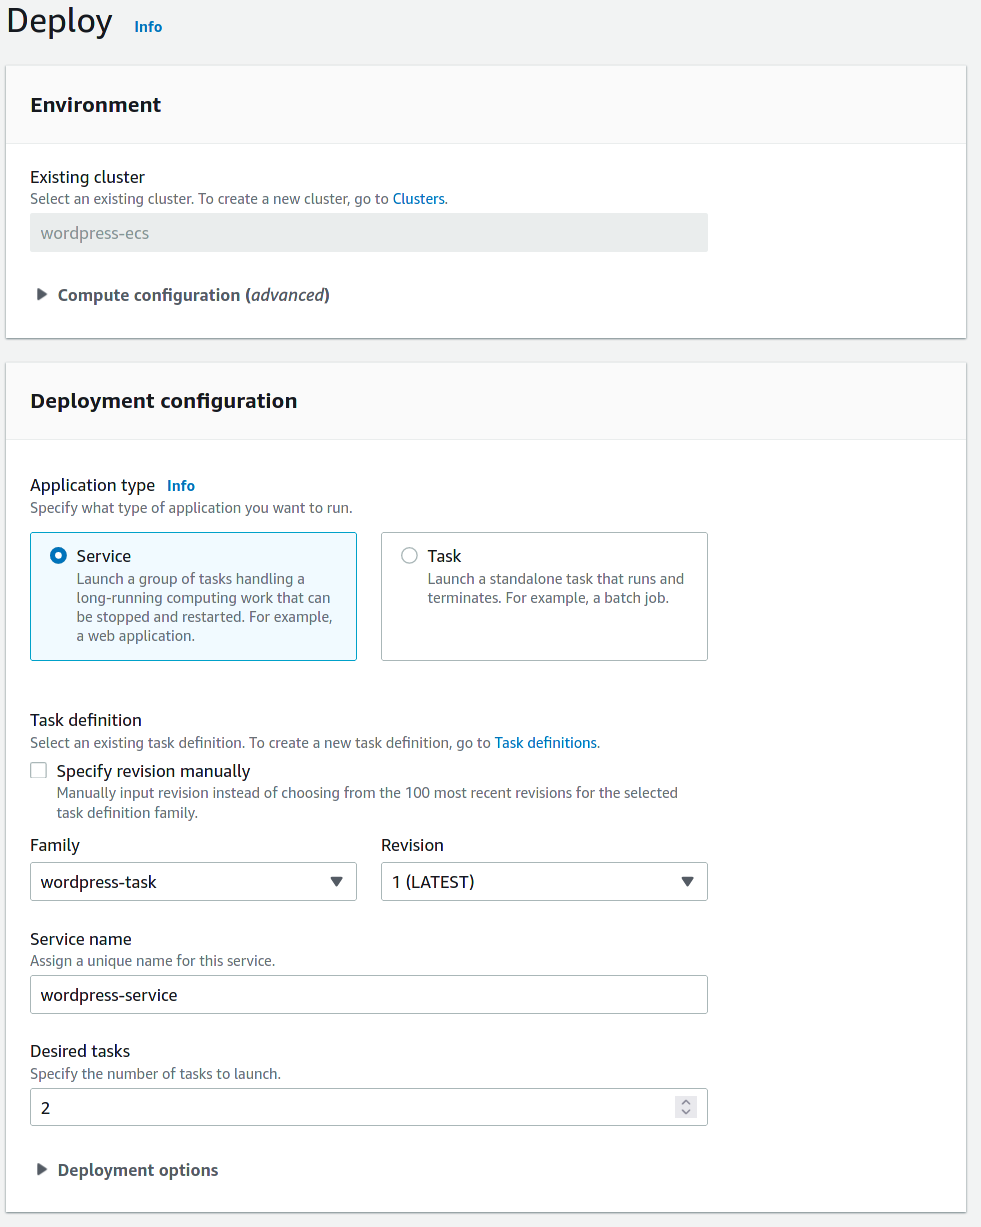
As you can see we already choose to deploy 2 tasks, so our wordpress installation will be highly available and load balanced.
We’re not showing you security groups and balancing options because they are common configuration tasks on AWS (need help ? Write to us!).
Storage
Since our container is stateless (by definition, here you can find more the details about differences between stateful and stateless services: https://blog.besharp.it/stateful-vs-stateless-the-good-the-bad-and-the-ugly/) we need to solve a final problem: static assets and persistence.
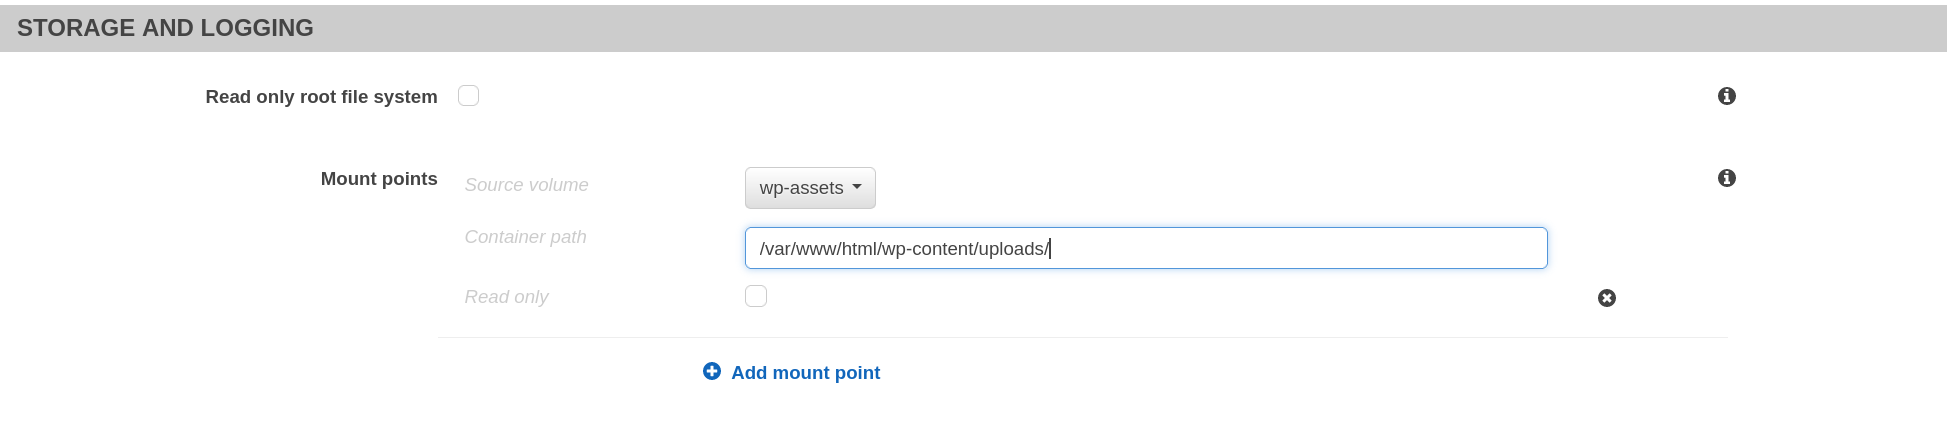
Our service of choice is Amazon EFS, a shared and distributed file system. We can store assets that are in the wp-content/uploads directory by simply adding an EFS filesystem it in the task definition and giving it a name:

And then define the mount in the container:
Don’t forget to add an AWS Backup job for the EFS share!
There are also WordPress plugins that can take advantage of S3. Since we want to keep our demo installation simple, we won’t use them for this specific case, but you can, consider them while planning your installation.
Caching
We will not show these steps but, as a general rule of thumb, you can reduce compute cost and make the site more responsive for users by adding a CloudFront distribution in front of your load balancer.
You can also use an application cache for user sessions and database query offloading using Amazon Elasticache for Redis with the redis-cache WordPress plugin.
Deploying a new Elasticache for Redis cluster is a matter of minutes: search for Elasticache on the AWS console and then click “Create”:

In the “Advanced Redis settings” create a new subnet group and select at least two subnets in different availability zones to keep the cluster private and highly available, select or create a security group to grant wordpress containers access to the Elasticache cluster.
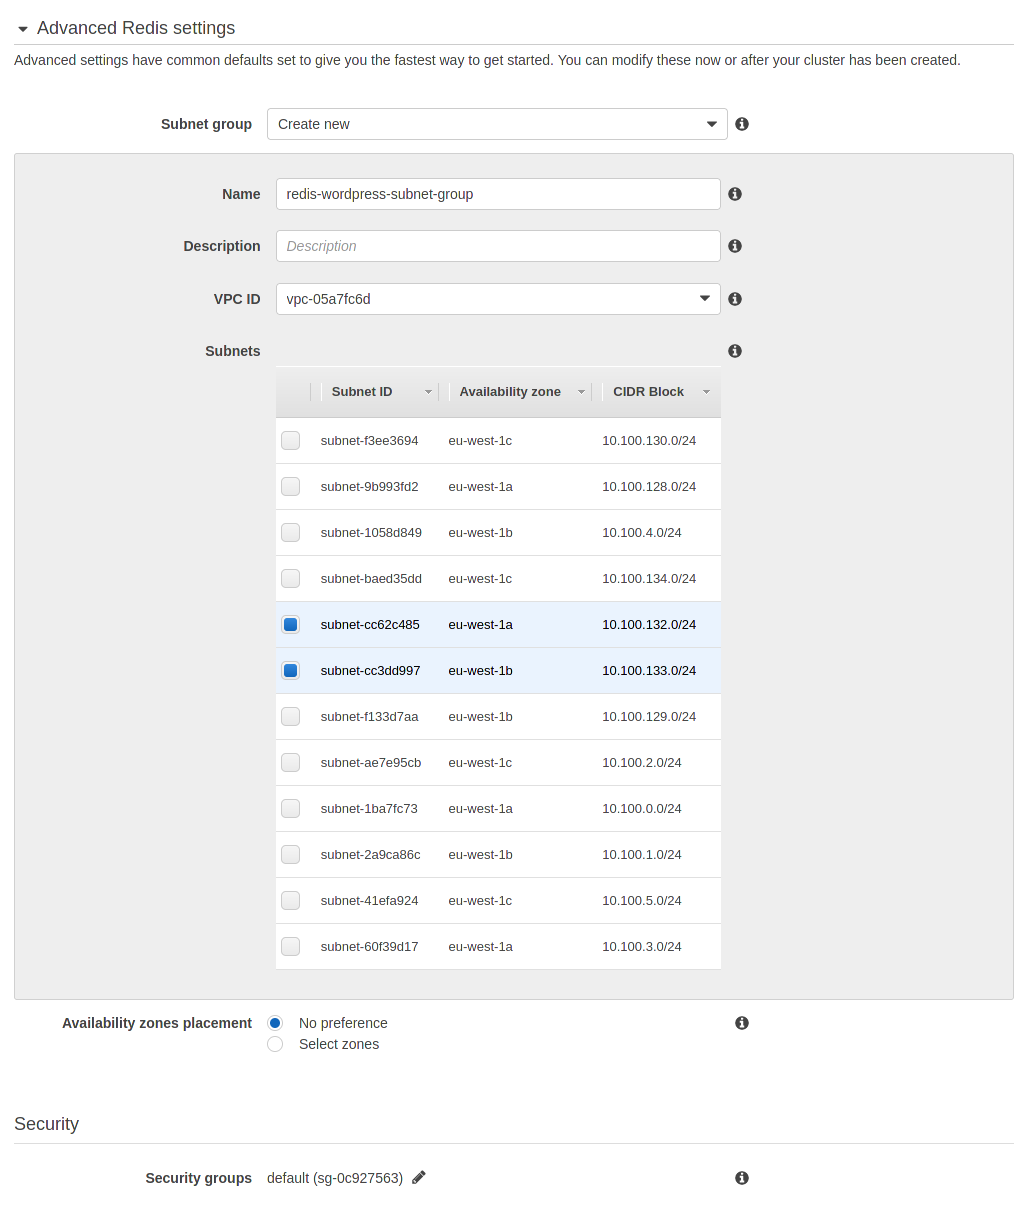
Click on “Create” and your cluster will be ready in a couple of minutes.
Add in the Dockerfile this line to install the redis-cache plugin
RUN --allow-root plugin install redis-cacheAnd then configure it to cache user sessions using the the primary endpoint shown in cluster details:

WAF
To prevent and mitigate attacks and common vulnerabilities consider enabling AWS WAF and configure it to use Managed Rules for AWS Firewall ruleset. You can enable AWS WAF on the Application Load Balancer or on the CloudFront Distribution (if you choose to use it)
Maintaining containers: ThePipelines!
Our choice for automating our WordPress container maintenance is the CodeBuild/CodePipeline duo.
simply follow these steps to deploy pipelines: https://blog.besharp.it/aws-fargate-services-deployment-with-continuous-delivery-pipeline/
You can also rely on a blu/green deployment strategy. Here's how to do it: https://blog.besharp.it/how-to-setup-a-continuous-deployment-pipeline-on-aws-for-ecs-blue-green-deployments/
Starting a containerized WordPress deployment from scratch isn’t hard: with the right managed services you’ll offload a lot of tasks like maintaining high availability, keeping the focus on maintaining content.
What's your experience with containerized WordPress deployment? Have you ever faced any challenges?
That’s all for today.
Keep reading and see you in 14 days on #Proud2beCloud!