Enabling enterprise Telemetry on AWS: Handling massive data backfills using ECS and Databricks wi...
17 June 2026 - 1 min. read
Keidi Xhafa


In this article, we explain how we have created a Continuous Delivery (CD) pipeline capable of producing a docker image for deployment on AWS ECS Fargate.
With the emergence of AWS Fargate, the realization of container-based services finally takes on a whole new meaning. In fact, before Fargate’s release, the only way to use Amazon ECS was to provide a cluster of EC2 instances managed by Amazon (for software, updates, and configuration). This type of solution requires sustaining the costs of the clusters, plan oversizing to allow for the scaling of tasks, and lastly, configuring and maintaining a valid autoscaling system to avoid lacking adequate container resources.
AWS Fargate allows for all of this management overhead to be handed to AWS, i.e., to launch container-based services by paying only for the actual execution time. No need to worry about the underlying cluster — the focus can instead be placed on service development.
With AWS Fargate, AWS is making the container a top-tier object in computing solutions.
Automating the deployment of container-based services is fundamental to fully take advantage of AWS Fargate and AWS Cloud potential.
Here is our solution for implementing a CD pipeline that can put in production every push on the selected repository branch.
Key infrastructure services include:
Amazon Elastic Container Service (Amazon ECS) is a container orchestration service. It supports Docker and allows for easily running and resizing applications. AWS Fargate facilitates starting and orchestrating container-based services by fully using AWS-managed clusters and paying on a container basis.
Amazon Elastic Container Registry (ECR) is a fully Docker-managed image registry that makes it easy for developers to store, manage, and distribute Docker container images.
It is possible to utilize the Elastic Load Balancing service to sort traffic via containers.
AWS Elastic Load Balancing automatically routes incoming application traffic between multiple destinations, including EC2, containers, IP addresses, and Lambda functions.
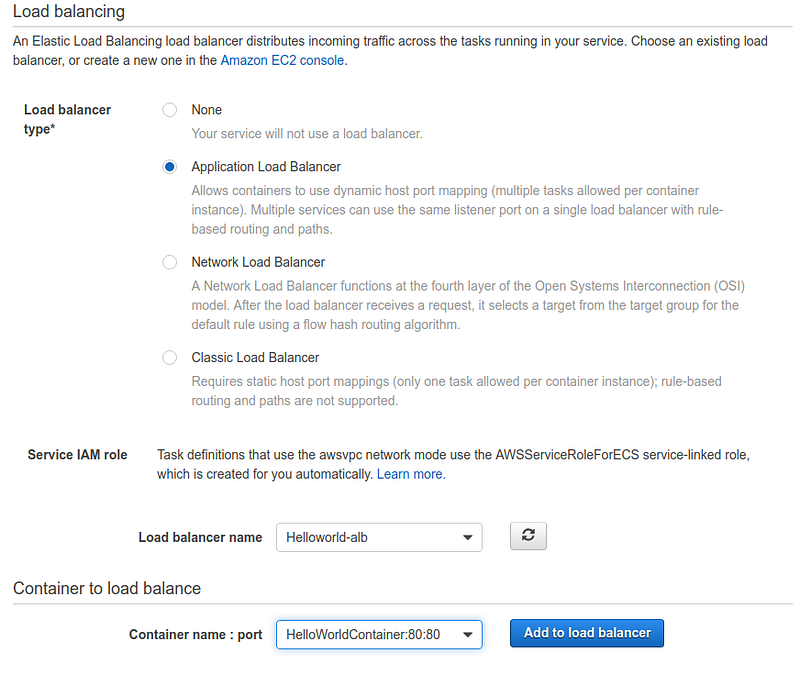
Elastic Load Balancing offers three types of load balancing systems:
The Application Load Balancer (ALB) is the load balancer for the services released on Fargate.
The Application Load Balancer systems are suitable for balancing HTTP and HTTPS traffic. They offer advanced request routing for the distribution of modern architectures, e.g. in microservices and containers. These systems operate at the level of individual requests (level 7) and route traffic based on the content of the request.
Without further delay, let us move on to the tutorial for creating a fully automated release pipeline.
Throughout the rest of the article, we will assume that the entire project code is in a CodePipeline-compatible repository.
First, prepare an image of our service for testing it both locally and on AWS.
It is, therefore, necessary to add a Dockerfile to the project, which will then be published in the repository. The file must contain instructions for building a container for all the software, dependencies, libraries, and configurations, as well as the package with our service.
This container can be safely tested locally or in a controlled environment in order to verify proper functioning.
Once the local tests are satisfying, one can proceed with the creation of an image and its publication on Amazon ECR.
The creation of an ECR repository follows, and the only data it requires is a valid name.Our docker image can then be uploaded to ECR by simply following the login and push instructions.
$(aws ecr get-login --no-include-email --region <regione>)
docker build -t <nome immagine> .
docker tag <nome immagine>:latest <ecr url>:latest
docker push <ecr url>:latest
Our service requires a Load Balancer to route traffic between replica containers.
For this reason, we need to create an Application Load Balancer whose configuration can be left blank. Defining behavioral details of the ALB is unnecessary because ECS is going to manage it dynamically during the containers’ scaling operations.
As for ECS, the first thing to do is to create a cluster. Clusters are nothing more than objects used to logically group services.
Access the ECS dashboard and select “create cluster”.
From the wizard, choose “Networking only”. This configuration tells AWS to use AWS Fargate for this virtual cluster.
If desired, select the name and a new VPC in the second and last wizard step. Otherwise, use one that has already been configured on your account.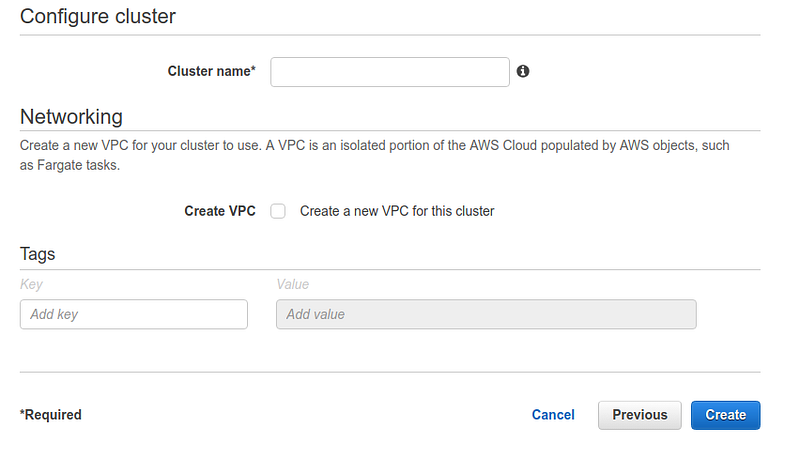
The second step creates a task definition. This object collects information about the task, i.e., name, description, IAM roles for deployment and execution, the size of the task in terms of RAM and CPU, and the specifications of the container that will host it.
Select the previously saved docker image on ECR to configure the container.
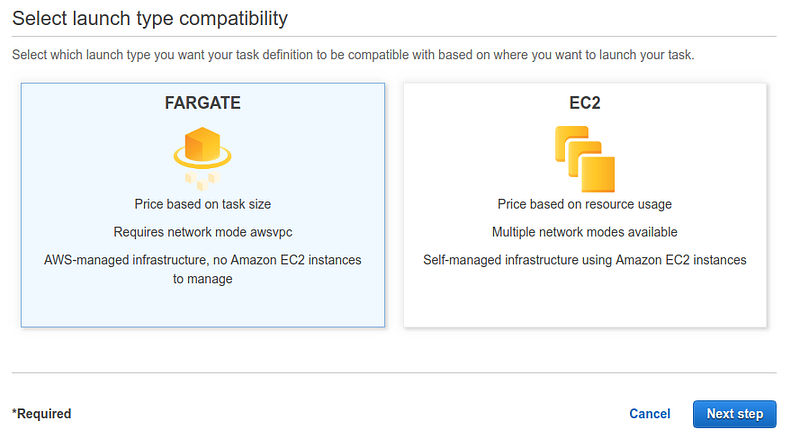
Simply select “Create task definition” from the appropriate screen in the ECS area.
It is essential to choose AWS Fargate as the wizard’s first step. Then input the requested data following the instructions and provide adequate sizing for the task.
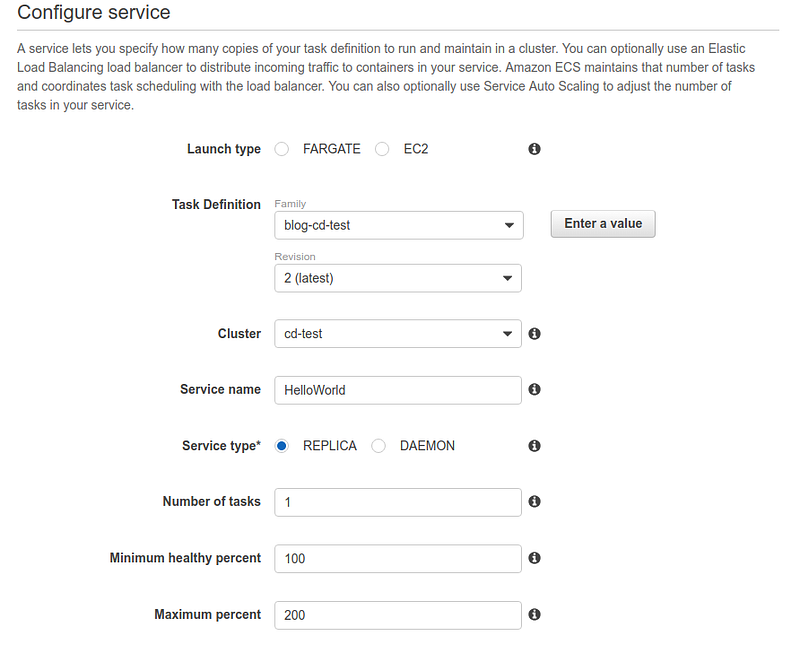
The last object to be configured is called service (Service).
A service is defined by a task and a set of parameters that specify how many instances of the task are required as a minimum, current, and maximum value to allow the service to function correctly.
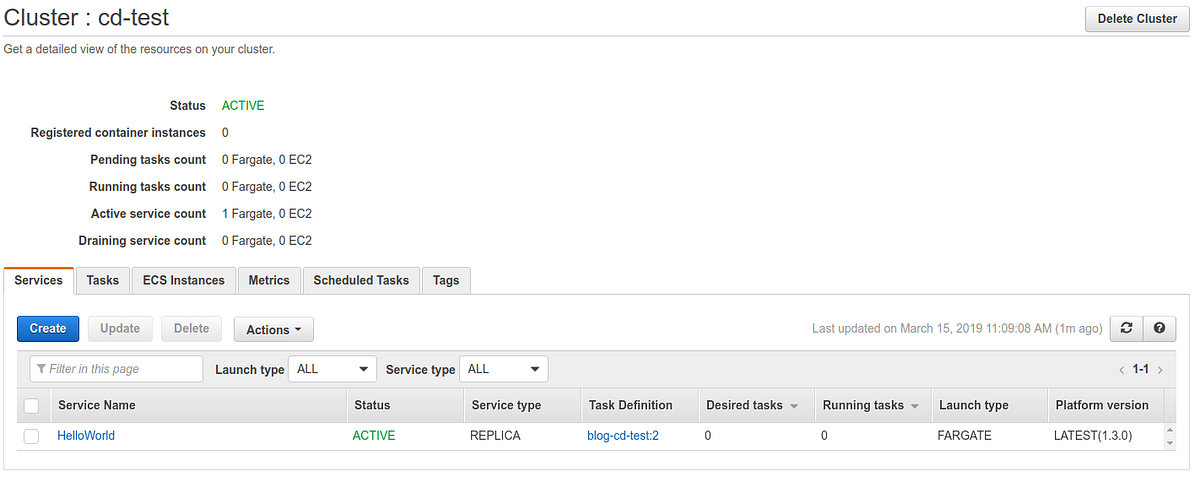
The creation procedure is no different from other configured objects.
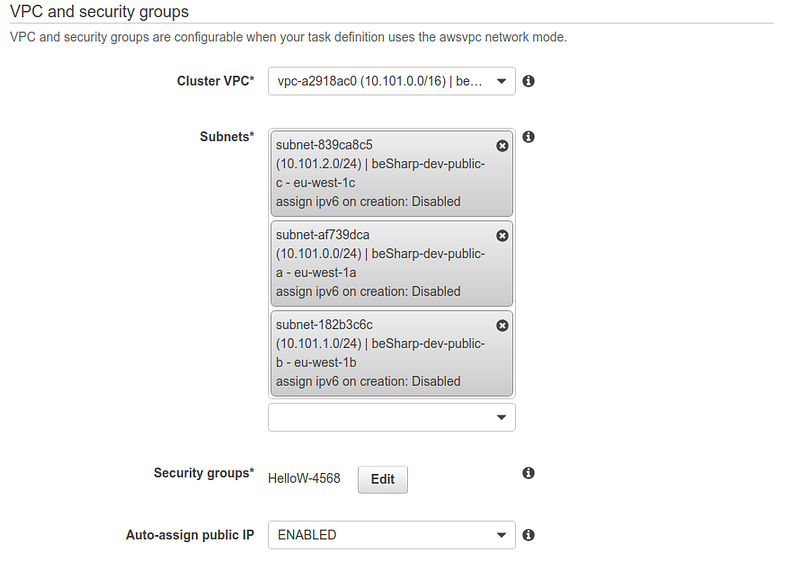
Be attentive when selecting the VPC, subnets, and previously created load balancer.
The service should be visible by pointing the browser to the ALB URL at the end of the configuration.
Once the entire environment has been manually configured, it is possible to create and configure a pipeline that automatically deploys each code change.
The file named buildspec.yml needs to be added to the repository root before starting the pipeline configuration. The purpose of the file is to contain the instructions for building a new image of our service.
In fact, we want to automate what was previously performed by hand, i.e., the construction of the docker image from the dockerfile and the code, its uploading to ECR, and lastly, ECS updating to perform the service deployment by using the new image.
Here is a sample version of the file to be added (buildspec.yml):
version: 0.2
phases:
  pre_build:
    commands:
      - echo Logging in to Amazon ECR...
      - aws --version
      - $(aws ecr get-login --region $AWS_DEFAULT_REGION --no-include-email)
      - REPOSITORY_URI=<REPLACE THIS TEXT WITH THE URL OF THE IMAGE USED ON ECR>
      - COMMIT_HASH=$(echo $CODEBUILD_RESOLVED_SOURCE_VERSION | cut -c 1-7)
      - IMAGE_TAG=${COMMIT_HASH:=latest}
  build:
    commands:
      - echo Build started on `date`
      - echo Building the Docker image...
      - docker build -t $REPOSITORY_URI:latest .
      - docker tag $REPOSITORY_URI:latest $REPOSITORY_URI:$IMAGE_TAG
  post_build:
    commands:
      - echo Build completed on `date`
      - echo Pushing the Docker images...
      - docker push $REPOSITORY_URI:latest
      - docker push $REPOSITORY_URI:$IMAGE_TAG
      - echo Writing image definitions file...
      - printf '[{"name":"<replace this text with the container name used in task definition>","imageUri":"%s"}]' $REPOSITORY_URI:$IMAGE_TAG > imagedefinitions.json
artifacts:
    files: imagedefinitions.json
The parts to be edited with the specific names of your project are in bold.
CodePipeline is the AWS service for implementing the automation with very low management and configuration effort. We will rely on CodeBuild to execute the file with the instructions (buildspec.yml) to perform image build operations.
So let us start with the pipeline configuration by creating a new one on CodePipeline:
At this point, the pipeline will try to run automatically, and it will fail.
This is an expected failure: the reason lies in the fact that the Wizard has created a CodeBuild role for us. However, this does not have all the necessary permissions to push the image to ECR.
To solve this, identify the generated role whose name follows this convention: code-build-build-project-name-service-role. Then add the following permissions:
AmazonEC2ContainerRegistryPowerUser to see the running pipeline.
If everything worked as expected, then the pipeline will now function. Further, the service will be automatically updated at every commit on the chosen branch.
Containers are increasingly at the center of the DevOps scene. As a result, it is important to know the available tools for making thoughtful and effective project choices. We hope to have been helpful to you in this regard.
Please share with us your results, observations, doubts, and ideas… Our team is looking forward to furthering this topic with you!
[ATTENTION, SPOILER!]
If you are intrigued by this subject, keep following us: a creative way to get a highly personalized automatic pipeline that uses containers as a means of automation is coming your way.
Stay tuned! ;)