
When Serverless runs on servers: new options for AWS Lambda and AWS Fargate with Managed Instances
04 March 2026 - 13 min. read
Damiano Giorgi
DevOps Engineer


 Have you ever found it useful to access an EC2 instance, belonging to an Auto Scaling Group, to configure it or to simply get an idea of what went wrong before an unexpected termination?Well, in those cases EC2 Auto Scaling Lifecycle Hooks come in handy. In this article, we will give you a deep understanding of how Lifecycle Hooks work and what are their common use cases.Just for clarity let’s review EC2 Auto Scaling's main characteristics and features, before going in detail with EC2 Auto Scaling Lifecycle Hooks. EC2 Auto Scaling is an AWS service that allows you to adapt the number of EC2 instances, serving your application, to meet the incoming load. These instances are logically grouped into Auto Scaling groups for which you can set the minimum, maximum and desired capacity. If there are no scaling policies attached to the Auto Scaling group, by default it maintains the desired amount of healthy instances, performing periodic health checks. Unhealthy instances will be terminated and replaced with new ones.Besides manual scaling, in which you actively change minimum, maximum or desired capacity, there are two automatic scaling types: Scheduled Scaling and Dynamic Scaling.Scheduled Scaling should be used if you know in advance how your application’s traffic patterns behave. In this case, you have to create a rule, called scheduled action, that instructs Auto Scaling to increase and decrease the Auto Scaling group’s capacity based on predicted load changes.Instead, when you need to scale in response to load changes that are not predictable Dynamic Scaling comes to the rescue. It provides different policy types that you can use to instruct Auto Scaling how to react to demand changes. There are three types of Dynamic Scaling policies:
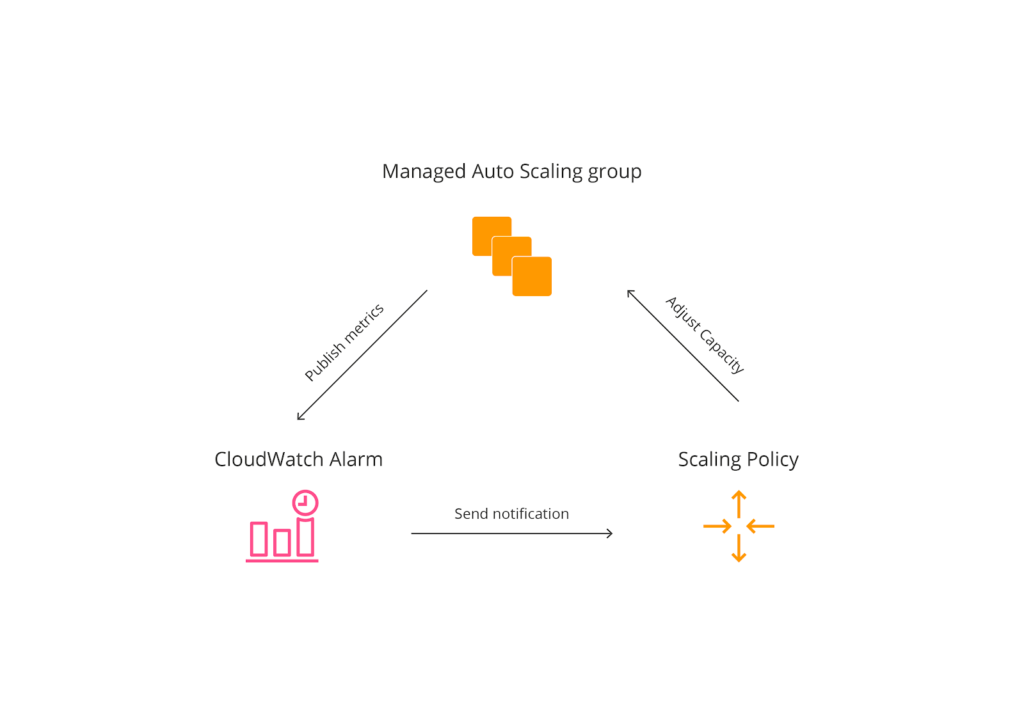 If an instance belongs to an Auto Scaling group, its lifecycle differs from other EC2 instances’ one. EC2 Auto Scaling Lifecycle is well illustrated in the following scheme.
 When a new instance is launched in response to a scale-out event, it first enters the Pending state. This state is designed to allow you to configure (preferably automatically) the EC2 instance and to check its healthiness before moving into the InService state.While into the InService state, the EC2 instance can potentially move to one of the following three states:
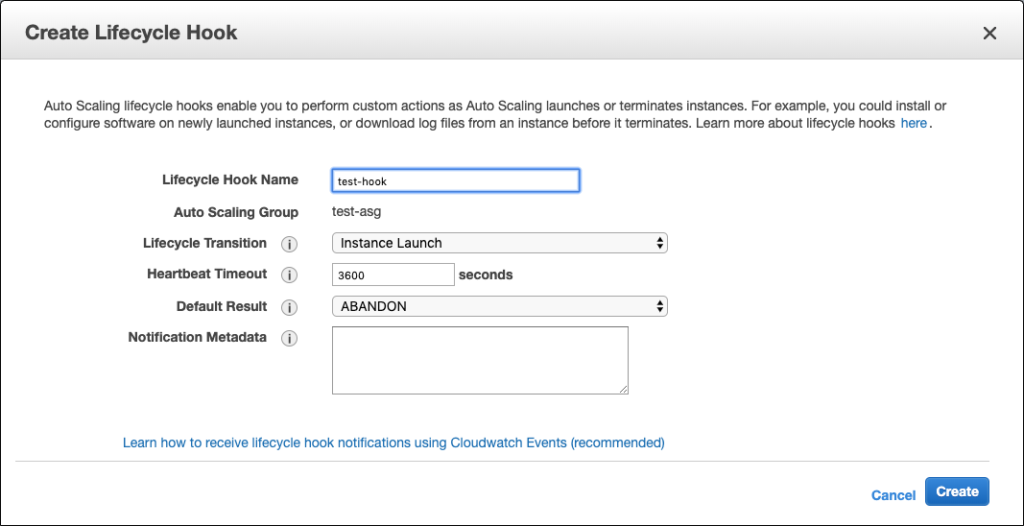
#!/bin/bash
apt update && \

apt install snapd && \

snap install aws-cli --classic && \

apt install -y apache2 && \

ufw allow 'Apache' && \

INSTANCE_ID="`wget -q -O - http://instance-data/latest/meta-data/instance-id`" && \

/snap/bin/aws autoscaling complete-lifecycle-action --lifecycle-action-result CONTINUE --instance-id $INSTANCE_ID --lifecycle-hook-name test-hook --auto-scaling-group-name test-asg --region eu-west-1 || \

/snap/bin/aws autoscaling complete-lifecycle-action --lifecycle-action-result ABANDON --instance-id $INSTANCE_ID --lifecycle-hook-name test-hook --auto-scaling-group-name test-asg --region eu-west-1
The User Data is going to install Apache Web Server on Ubuntu 18.04. When the installation is completed, it harvests the instance-id and uses it to complete the lifecycle action with CONTINUE result, which tells to the Auto Scaling group to put the instance into InService state.If anything goes wrong, complete-lifecycle-action command will be invoked with ABANDON result, telling the Auto Scaling group to terminate the instance.Take care of --lifecycle-hook-name and --auto-scaling-group-name parameters’ values used in the configuration script; they should correspond, respectively, to the name of the EC2 Auto Scaling Lifecycle Hook and to the name of the EC2 Auto Scaling group that you are going to create later.Firstly, you have to create a new Launch Template, specifying ubuntu/images/hvm-ssd/ubuntu-bionic-18.04-amd64-server-20190722.1 as the source AMI and the configuration script, described above, as User Data field.Then, you can create a new Auto Scaling group based on the just created Launch Template. During the Auto Scaling group configuration, specify one or more subnets in which the EC2 instances will have internet access to. Otherwise, they will not be able to install Apache Web Server.Before moving on, make sure that the Auto Scaling group’s initial DesiredCapacity and min parameters’ values are set to zero; the initial max parameter’s value can be set to one.Move to the Auto Scaling group’s Lifecycle Hooks tab and click the Create Lifecycle Hook button. Configure the lifecycle hook as illustrated in the picture below.
 To test the lifecycle hook’s behavior, increase the DesiredCapacity parameter’s value by one.A new instance will be added to the Auto Scaling group. Under the Auto Scaling group’s Instances tab, you should see the newly created instance’s Lifecycle column set to Pending:Wait. That means the instance’s lifecycle is paused to the Pending state until complete-lifecycle-action command is invoked from the User Data script.When the Status column changes to InService, log into the new EC2 instance through SSH. To check the status of the Apache Web Server, type sudo systemctl status apache2If the response of this command is something like...