Enabling enterprise Telemetry on AWS: Handling massive data backfills using ECS and Databricks wi...
17 June 2026 - 1 min. read
Keidi Xhafa


 One of the most recurring features in web and mobile applications is certainly user authentication; being able to off-load the responsibilities related to user authentication management greatly increases the resilience of the solutions implemented and the speed of development. The use of managed services allows the development team to automate and make more resilient critical functionalities such as user authentication. Especially when creating web applications. The managed services dedicated to solving this aspect is Amazon Cognito. Amazon Cognito provides a building-block that can accelerate and secure the process of authenticating and authorizing users to mobile or web applications. Before getting into the heart of the matter it is useful to define the specific terms of the service and the preparatory concepts to understanding the topics covered.
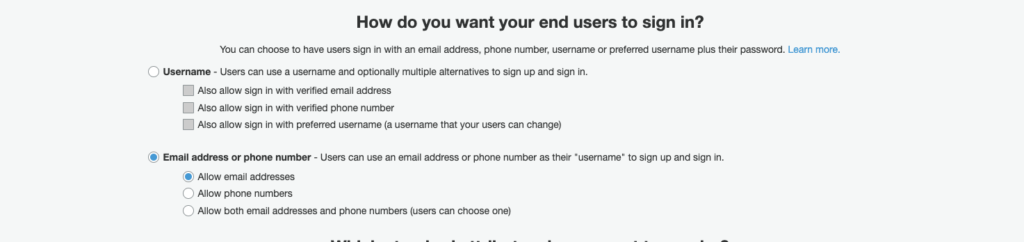 In this step, it is possible to configure the level of security to which every user will have to follow in order to create a secure password. We can insert the minimum limit of password characters and various constraints on the mandatory use of special characters, numbers, capital letters, and lowercase letters. We leave for the rest the default values and continue with the other configurations. The second and third points of this step allow us to configure the way users are created and the maximum duration of temporary passwords generated by administrators for new users. Basically, we have two ways to create users. The first allows users themselves to be able to register through a registration page, the second instead provides an invitation by the system administrator. This means that it will be the user who owns the application, through the Amazon Console or through the CLI, to create the user with a temporary password that the user will change at first login. For our tutorial, we select the possibility of being able to register users independently (as shown in the image) and continue by clicking the "Next step" button.
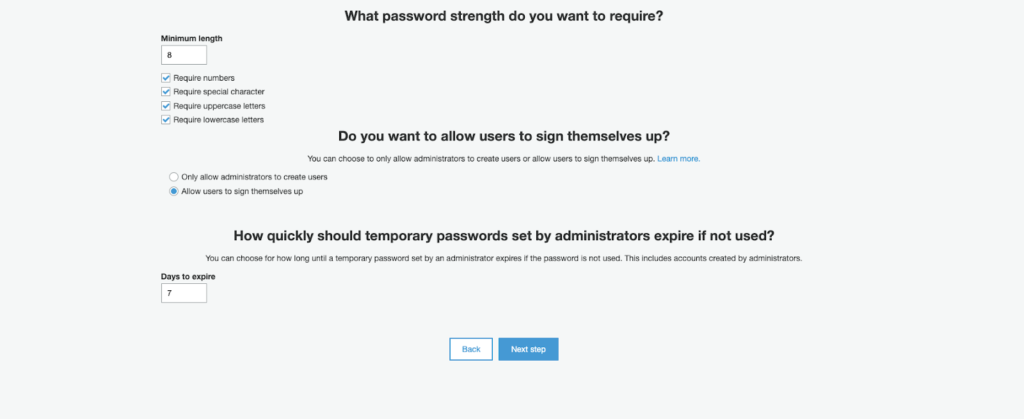 In this part of the wizard, we can enable the Multi-Factor Authentication and optionally the verification of the e-mail/phone during registration. For our tutorial, we can leave the MFA disabled and select "e-mail" as an attribute to verify in case of independent registration. In the next step, instead, it is possible to configure all the automatic messages that will be sent by Cognito to the end-user. These messages include temporary passwords and verification codes that can be sent via e-mail or via SMS by configuring Amazon SNS. For our tutorial, we can leave everything at default and move onto the next step. At this point in the wizard, we can add tags to the resource we are going to create. We add the appropriate tags or even none if it's just an experiment and move onto the next step. Now we are asked if we want it to automatically save the devices so as not to require the use of the MFA at every access. Since in the previous step we left the MFA disabled, we select "No" and proceed to the next step.We are now asked to create an App Client which will then be used by our application to make the necessary registration and login calls. To do this, simply press the "add an app client" button, enter a name, remove the checkmark from"Generate client secret" and press the "Create app client" button.
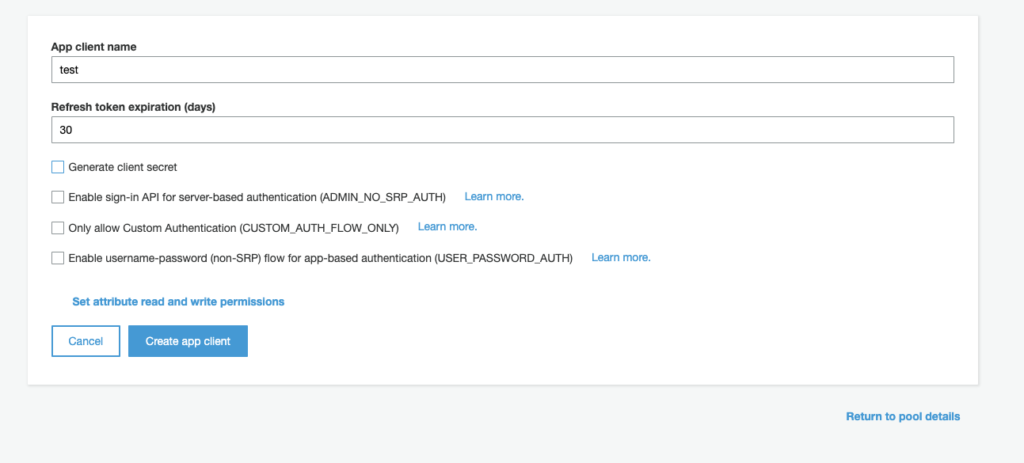 We can then finish the wizard by creating the user pool by pressing the button on the last screen. Before moving onto the integration configurations and choose a domain name for our User Pool. Once chosen, click on the "Check availability" button and then on "Save changes".
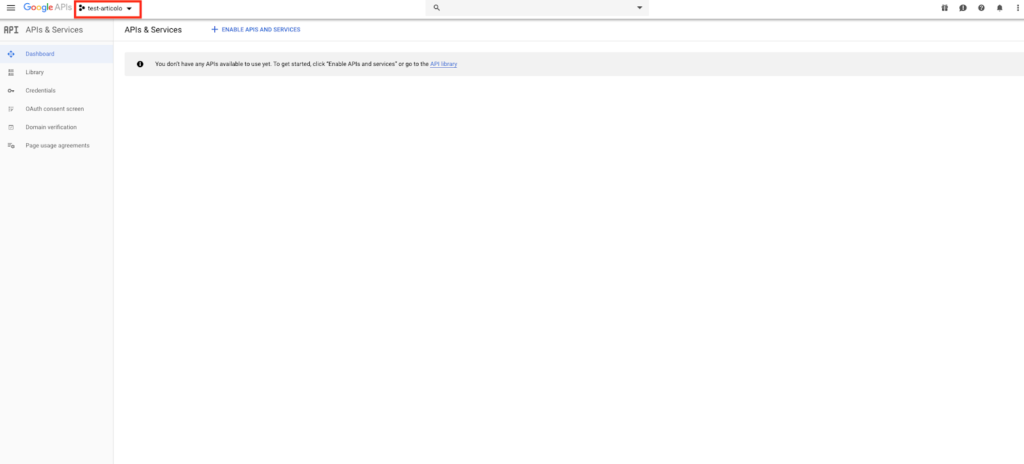
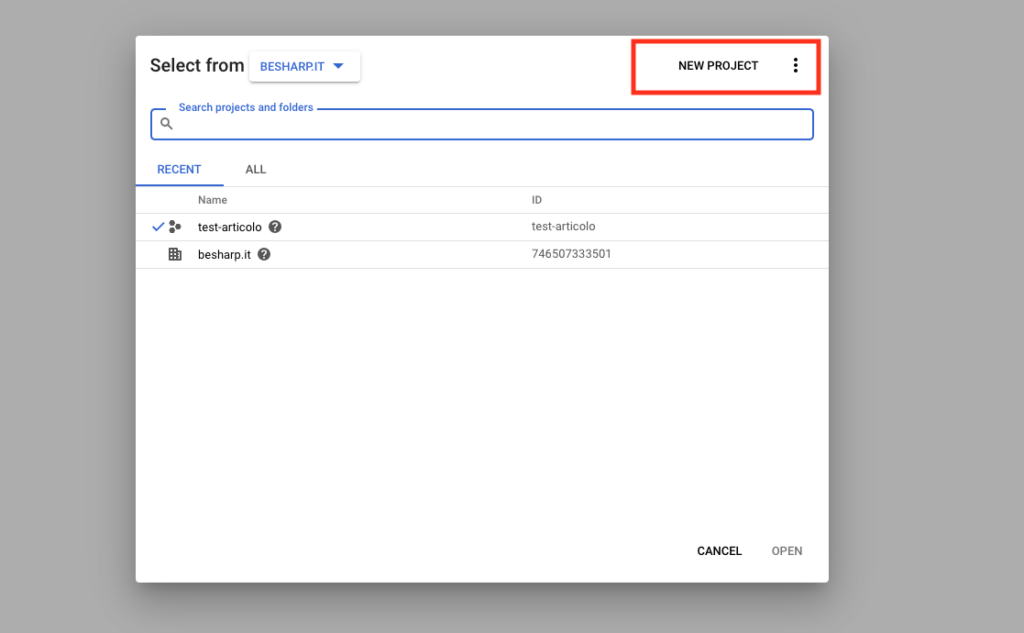
 Once we have created our project, we go to the "OAuth Consent Screen" entry.Here we will configure the name of the application and we will enable the domain"amazoncognito.com". To do this, just insert it in the appropriate field called "Authorized Domains" and click on the "Save" button. Let's now go under the "Credentials" field and click on the "Create credentials" button selecting "OAuth Client ID" from the proposed drop-down menu.
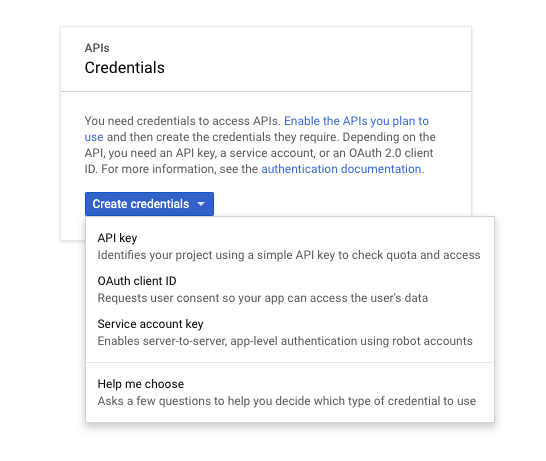 We then select "Web application", insert a name for our client and as authorized javascript sources, we enter the domain name of our Cognito User Pool previously created (eg: https://test-articolo.auth.eu-west- 1.amazoncognito.com). We then go on to enter the same domain name followed by /oauth2/idpresponse within the authorized redirection URI field (eg: https://test-articolo.auth.eu-west-1.amazoncognito.com/oauth2/idpresponse) and press the "Create" button. At this point, a popup will appear containing our "Client ID" and our "Client Secret". We copy the secrets into a text file to have them quickly available later on. Let's now move on to the integration of Cognito and Google starting with Amazon Cognito.Navigate through the "Identity Provider" menu and select the type of integration we want to carry out.
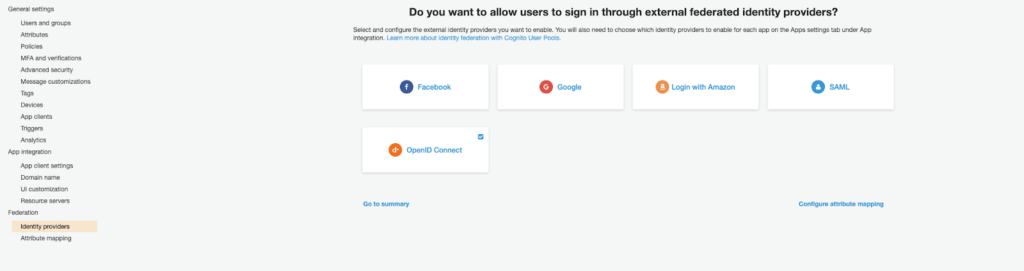 From this point of view, Amazon offers integration with major identity providers including Facebook, Google, Amazon and, more generally, all providers that support OpenId and SAML protocols. For this tutorial, we're going to integrate with Google. To do this, we click on the "Google" button and we will enter the information of the identity provider with those returned to us during the creation of the Google project. The last remaining step concerns the linking of the two previously created resources. To do this, just navigate through the "App client settings" tab. In the proposed screen, we will have to select our identity provider previously created as Identity Provider and supply the callback endpoints as in the image. The callback endpoints will be the endpoints called at the end of authentication and will contain our token.
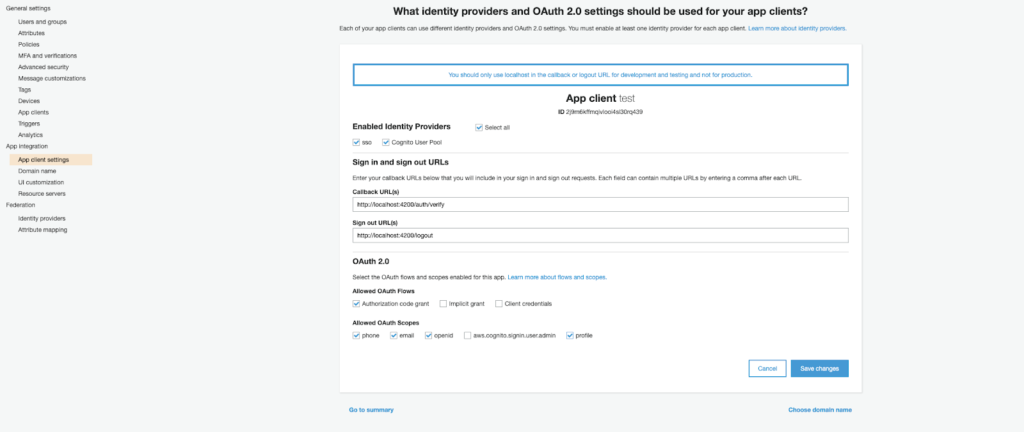 To do a test we can use the Hosted UI provided by Cognito browsing to the domain we previously chose and passing our client id, the redirect uri and some additional information as an example: https://test-articolo.auth.eu-west-1.amazoncognito.com/authorize?client_id={client-id}&redirect_uri=http://localhost:4200/auth/verify&response_type=token Once the authentication process is complete, we will automatically be redirected to our callback address http://localhost: 4200/auth/verify with the difference that we will find our access tokens in the query string parameter. At this point, it is up to the application to retrieve the tokens from the callback call, which for the purpose of this tutorial we set to localhost, and use them for subsequent back-end calls.With this tutorial, we have seen how to configure the integration between Amazon Cognito and Google from start to finish. We have illustrated and tested how to get the identification token and how to use it to access back-end services.Stay tuned for more interesting tutorials!