Enabling enterprise Telemetry on AWS: Handling massive data backfills using ECS and Databricks wi...
17 June 2026 - 1 min. read
Keidi Xhafa


With the Internet of Things quickly becoming a thing of the present (rather of the future...) the number of devices sending collected on the field is increasing exponentially and so does the amount of data, thus data ingestion and analysis has become of the hottest topics of the current IT landscape. AWS offers a wide range of services which allow us to ingest, collect, store, analyze and visualize huge amounts of data quickly and efficiently.
In this brief article, we would like to present a very simple real-world application we developed as a proof of concept demonstration to show the data ingestion and analysis pipeline in AWS and IoT events and conferences.
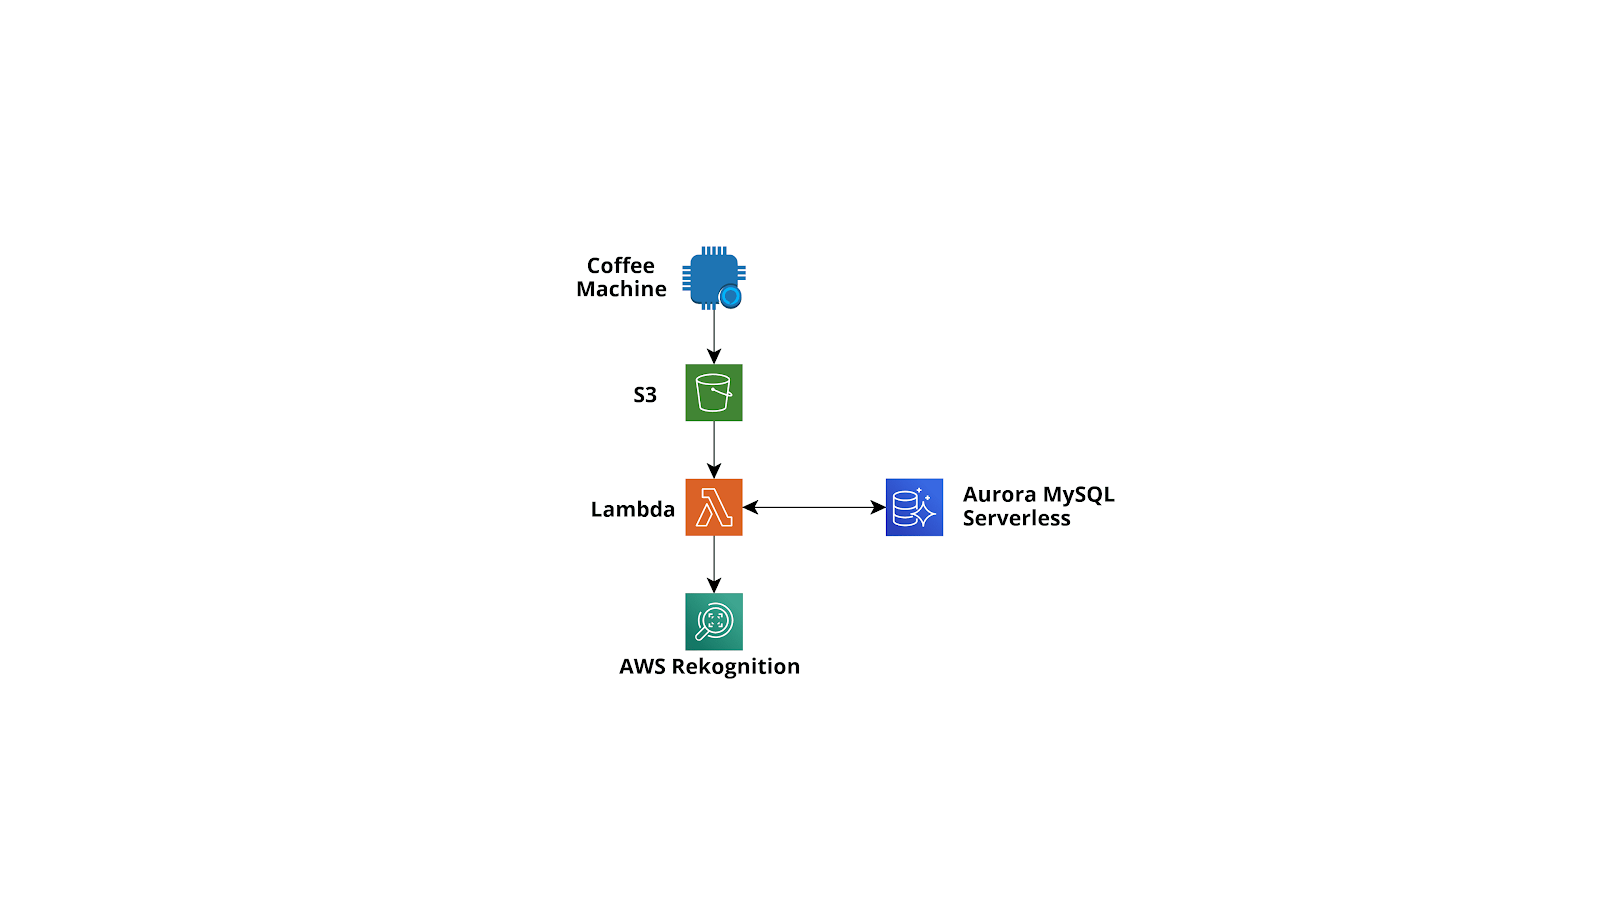
We customized an existing Nespresso coffee machine to take photos of people making coffees using custom electronics, a Raspberry Pi Zero, and a micro camera. The image is immediately uploaded to Amazon S3 and an AWS Lambda triggered by the upload analyzes the image using Amazon Rekognition. After the analysis of the image is complete, if the image contains the face of a person, a record is written by the Lambda function in an Amazon Aurora MySQL serverless together with metadata output from the Amazon Rekognition ML algorithm: does the person have eyeglasses? beard? mustaches? is she/he smiling? Finally, a very simple web application was developed and connected to the database to show statistics.
Furthermore, an Amazon Athena query cleans the data and moves them to a new Amazon S3 bucket as parquet files.
Obviously, for our trivial application, many of these steps are redundant but they aim to demonstrate the power of AWS building blocks in creating very complex data pipelines.
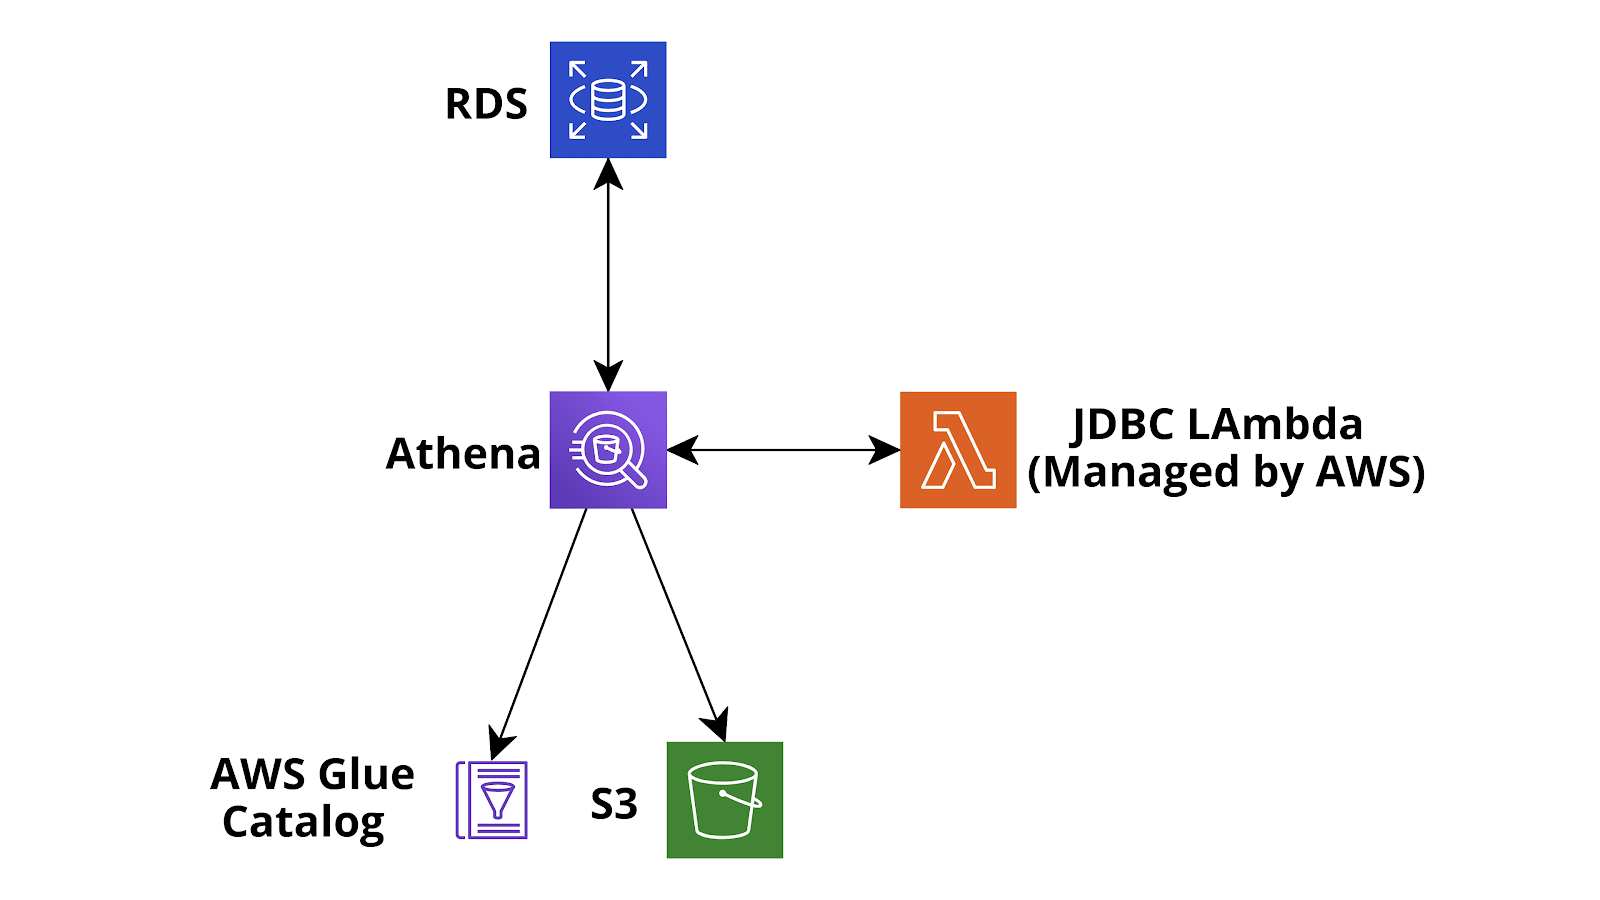
A scheme of the proposed infrastructure is shown below.
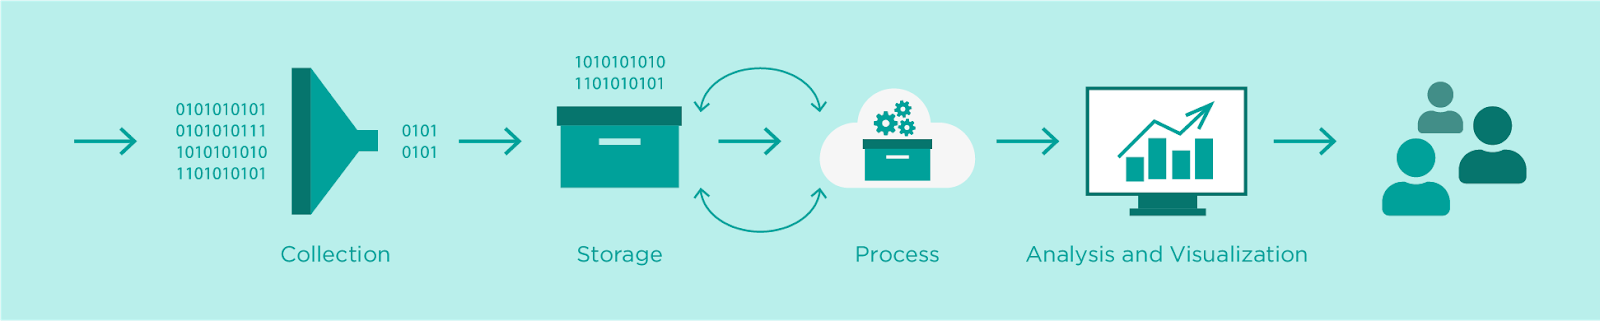
Hereafter we describe all the steps of a common data ingestion and transformation and how we are doing them in our trivial application. Let’s dive deep!
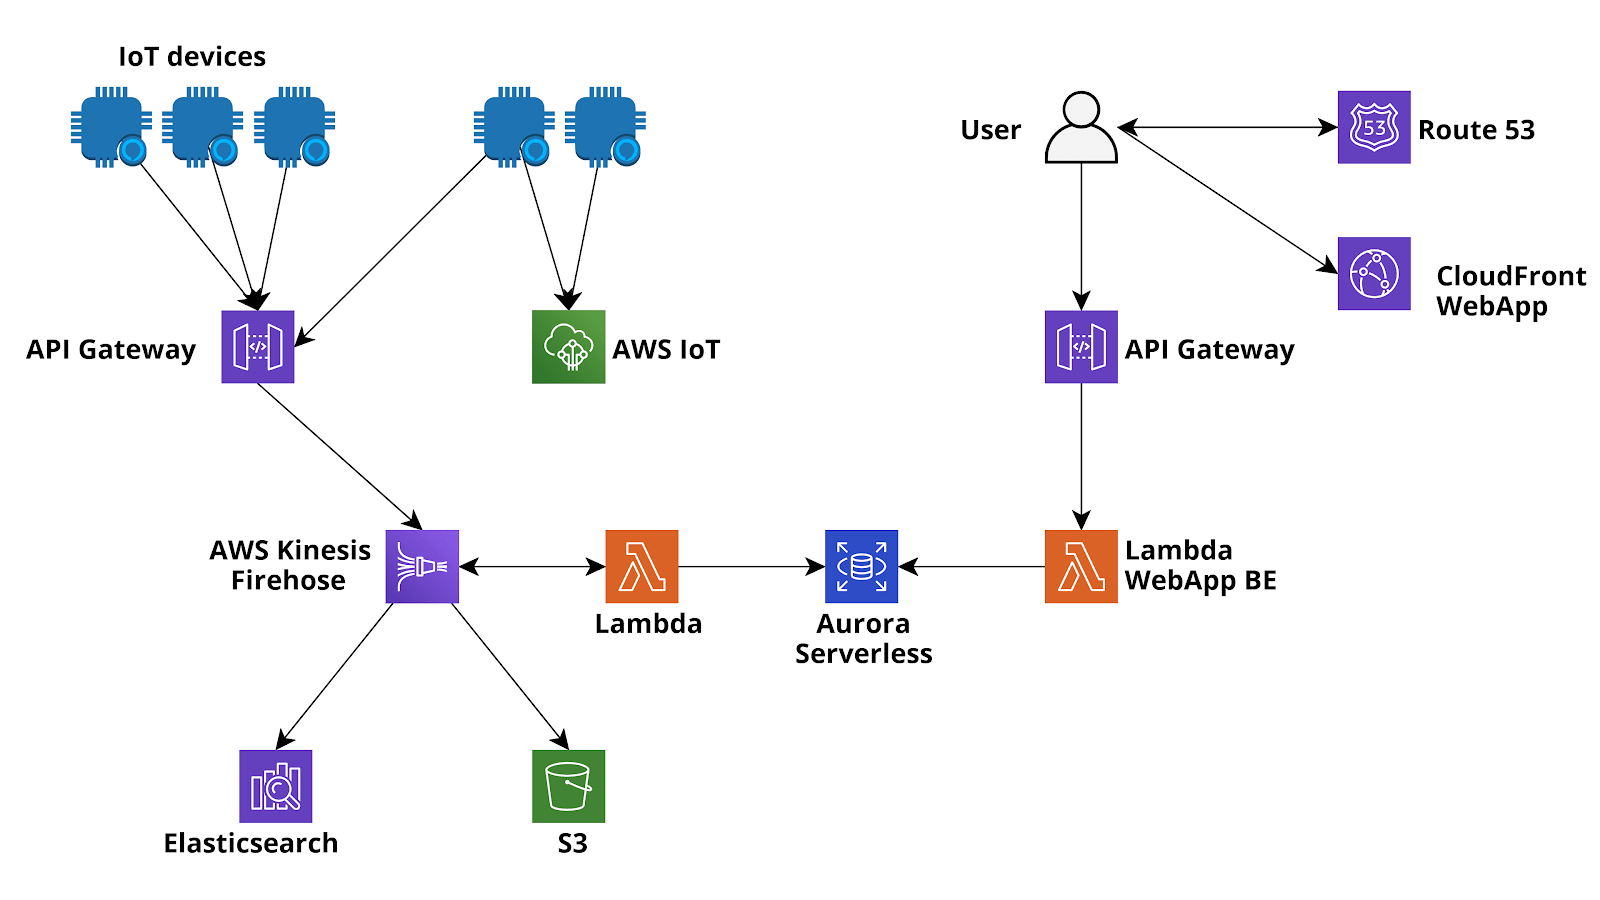
A very common AWS data ingestion flow is to use AWS IoT Core (Secure MQTT) or Api Gateway (REST APIs or Websocket) as the data entry point, directly connect the data entry point to Amazon Kinesis Firehose (using IoT rules or Api gateway Service integrations) and finally leverage the powerful Firehose features for data buffering, buffer transformation (AWS Lambda functions), stream encryption (AWS KMS), data compression (GZIP) and data delivery of compressed and automatically encrypted message batches to both long term object storage (Amazon S3) and/or to a data warehouse (AWS Redshift) for complex analytical queries on the huge amount of data collected.
Always having all the ingested data saved in Amazon S3 is an essential step, not only as a lifesaver in case of problems with other hotter storages but also to create a shared data lake which can be later analysed with Amazon Athena EMR, AWS Glue Jobs, AWS Glue databrew and also external tools.
Furthermore, you can use Firehose to directly deliver data to AWS ElasticSearch for real-time analysis and if needed it is also very easy to deliver the batches of ingested data to a relational database (e.g. Amazon Aurora Serverless Postgres/MySQL) using either AWS Data Migration tasks or event-based Lambda functions. Migrating inserted data (or aggregation of inserted data) to an existing relational database is often quite useful if you need them to enrich an existing legacy application already using the database.
If you decide to use Lambda functions to move the ingested data to Amazon Aurora, which is usually faster and more scalable, you can either use the Firehose transform functions directly or a different function triggered each time Firehose writes an object to Amazon S3.
The beauty of Firehose is that you can also add it as a subsequent step! In our simple coffee application, we are not using it, and images and analyses are saved directly in Amazon S3 and Amazon Aurora Serverless MySQL by Lambda Functions. Anyway, if the app grows bigger we can integrate it flawlessly!
Once your data is in storage, it is time to analyse them. Methodologies can differ greatly and common examples range from simple queries run in relational databases to long and complex analytical jobs run in Redshift data warehouses and to near real-time processing using Amazon Kinesis connected EMR or ElasticSearch.
In our case, we can just run simple queries using our web application backend and display the results in the browser.
However, in the future, we may be interested in running much more advanced queries on our data and maybe doing some data quality inspection and machine learning training. So we need to have these data out of Amazon Aurora and into Amazon S3 in order to analyze them with AWS Glue jobs and Databrew and if needed to load them easily with Apache Spark either from AWS Glue or AWS EMR. To do this, we can follow several paths: for example, we could use AWS DataMigration service to move the data to Amazon S3 as Parquet files or maybe we could create a AWS Glue Job, load the data using AWS Glue Connection to RDS and Spark and then write them into Amazon S3.
After this would need to run an AWS Glue crawler in order to create DataCatalog that will be used by Amazon Athena and AWS Glue for queries and jobs.
Here however we will show you a different and sometimes much more flexible path to export, clean, and catalog our data from a relational database: Amazon Athena custom data source.
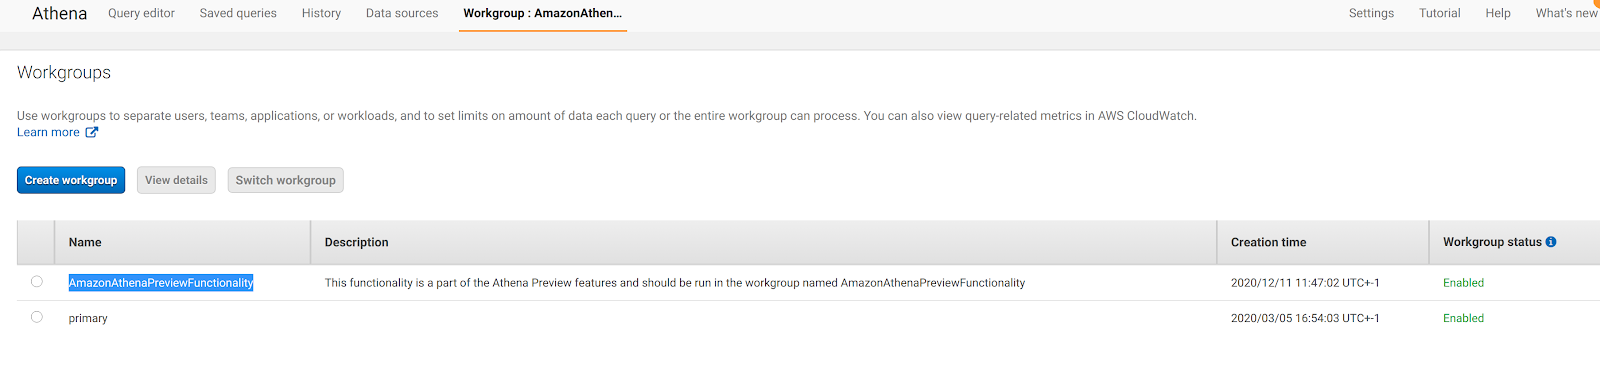
By default, Amazon Athena comes with Amazon S3 - AWS Glue data Catalog integrations but AWS recently added the possibility to add customized data sources such as JDBC connected databases, AWS CloudWatch or to query Amazon S3 but using a custom Apache Hive metastore. In our case we are interested in connecting to MySQL Amazon Aurora Serverless so we need to go to Amazon Athena Home, configure a workgroup named AmazonAthenaPreviewFunctionality and then add an Amazon S3 query output path:
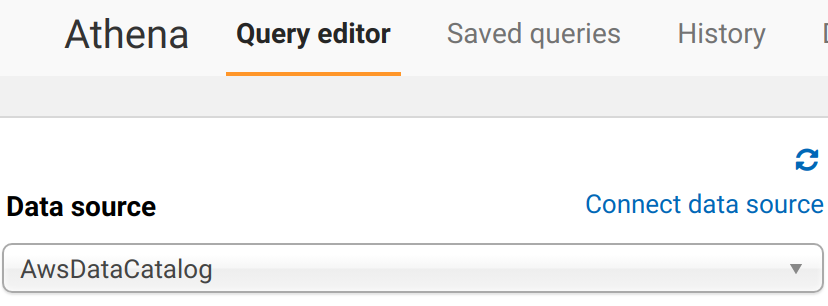
After this, we can go back to Amazon Athena home and select Connect Data Source:
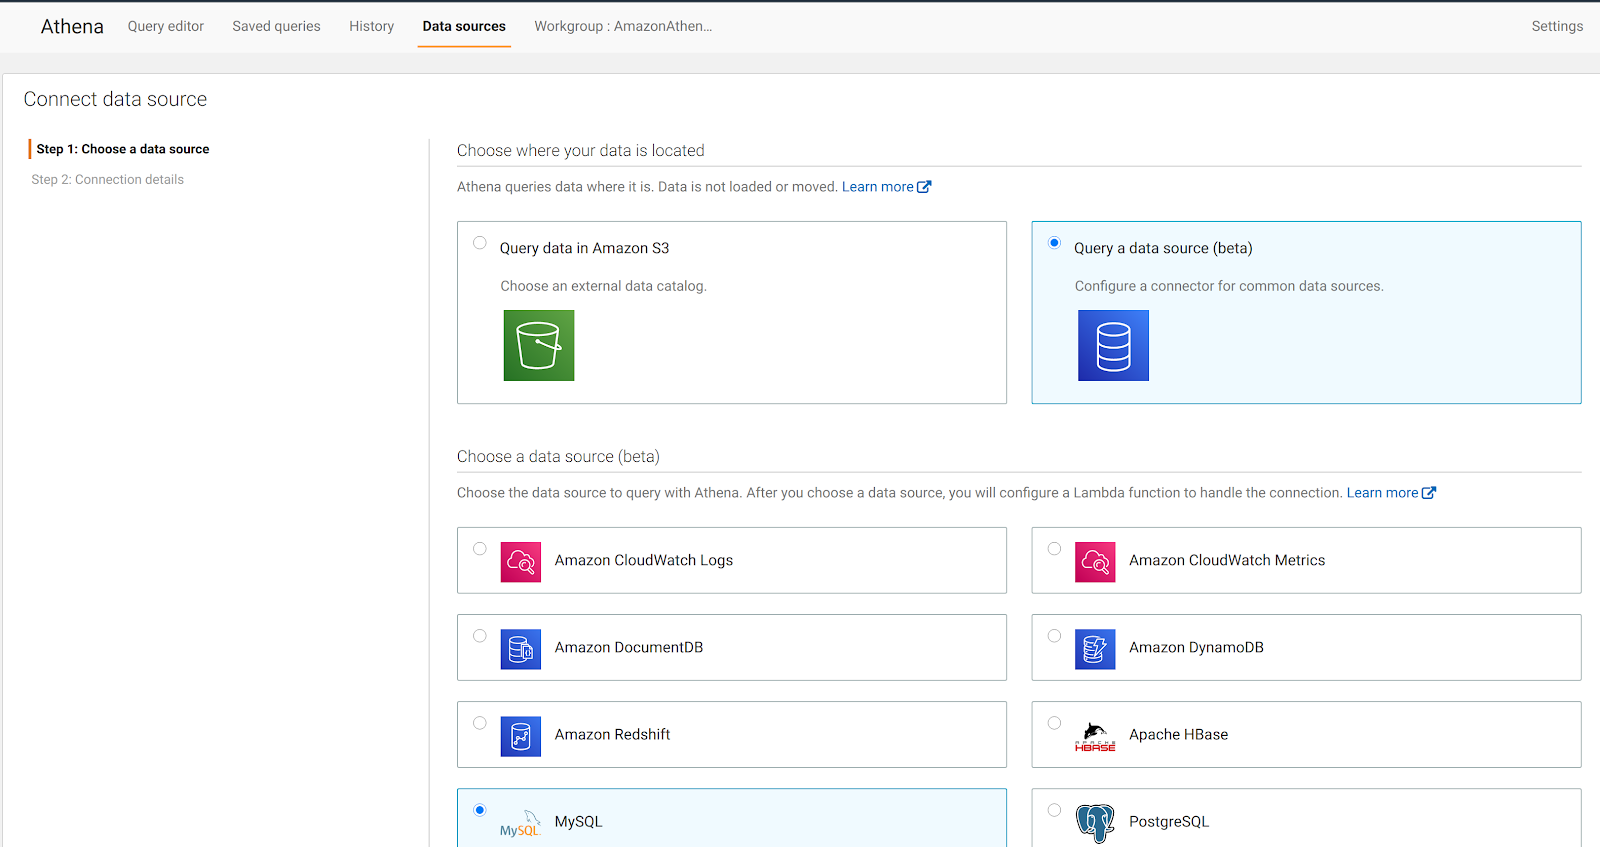
We are presented with a web page where we need to select the type of data source: we go for Query a data source (beta) ad MySQL:
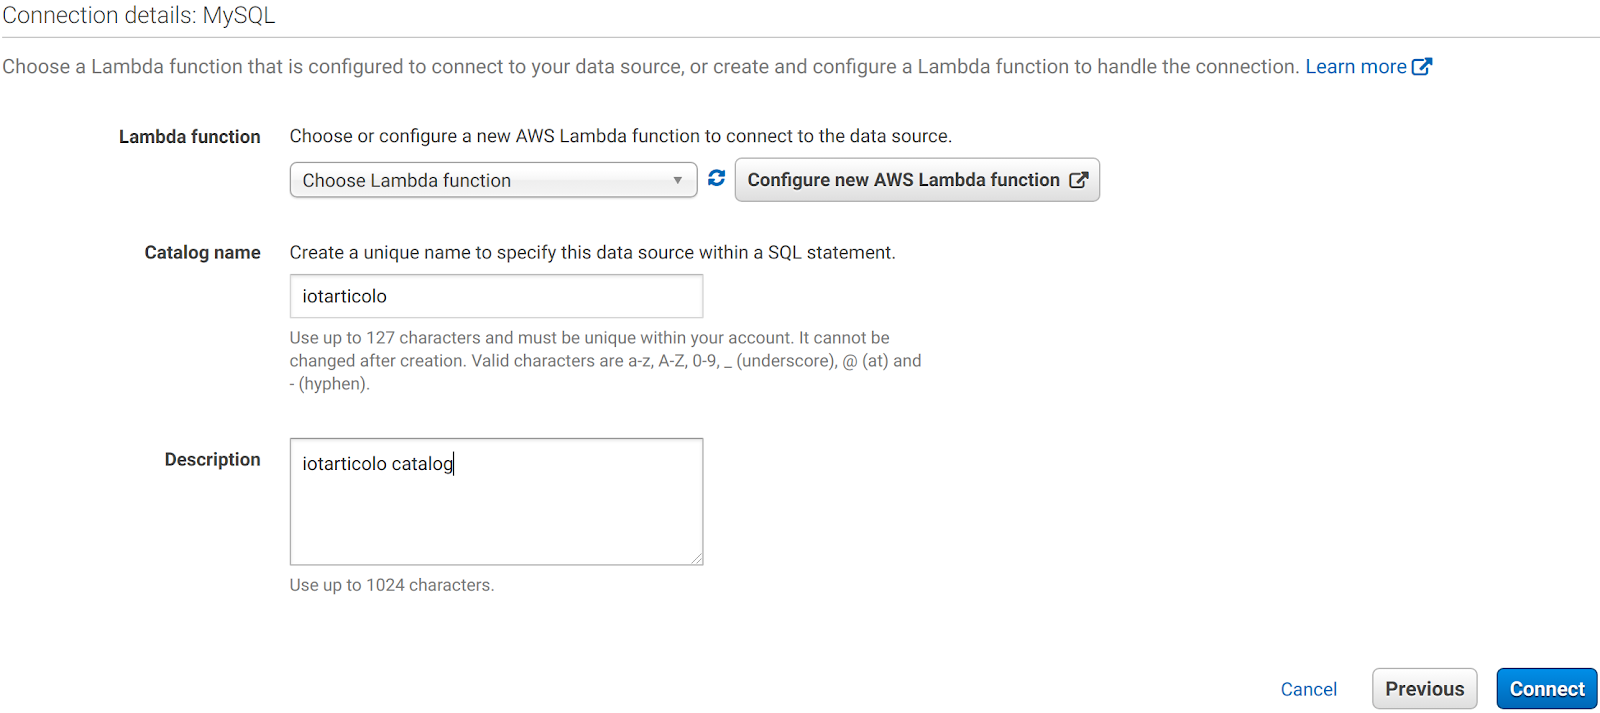
After that, you are requested to enter the name and description of the new catalog and to select or create a Lambda Function to manage the connection. Choose the name you like the most and click Configure new AWS Lambda Function.
You are presented with this page where you need to enter the JDBC connection URI for Amazon Aurora and select the subnet and security group for the Lambda function that Amazon Athena will use to establish the JDBC connection. Choose them wisely otherwise the Lambda won’t reach the Amazon Aurora instance!
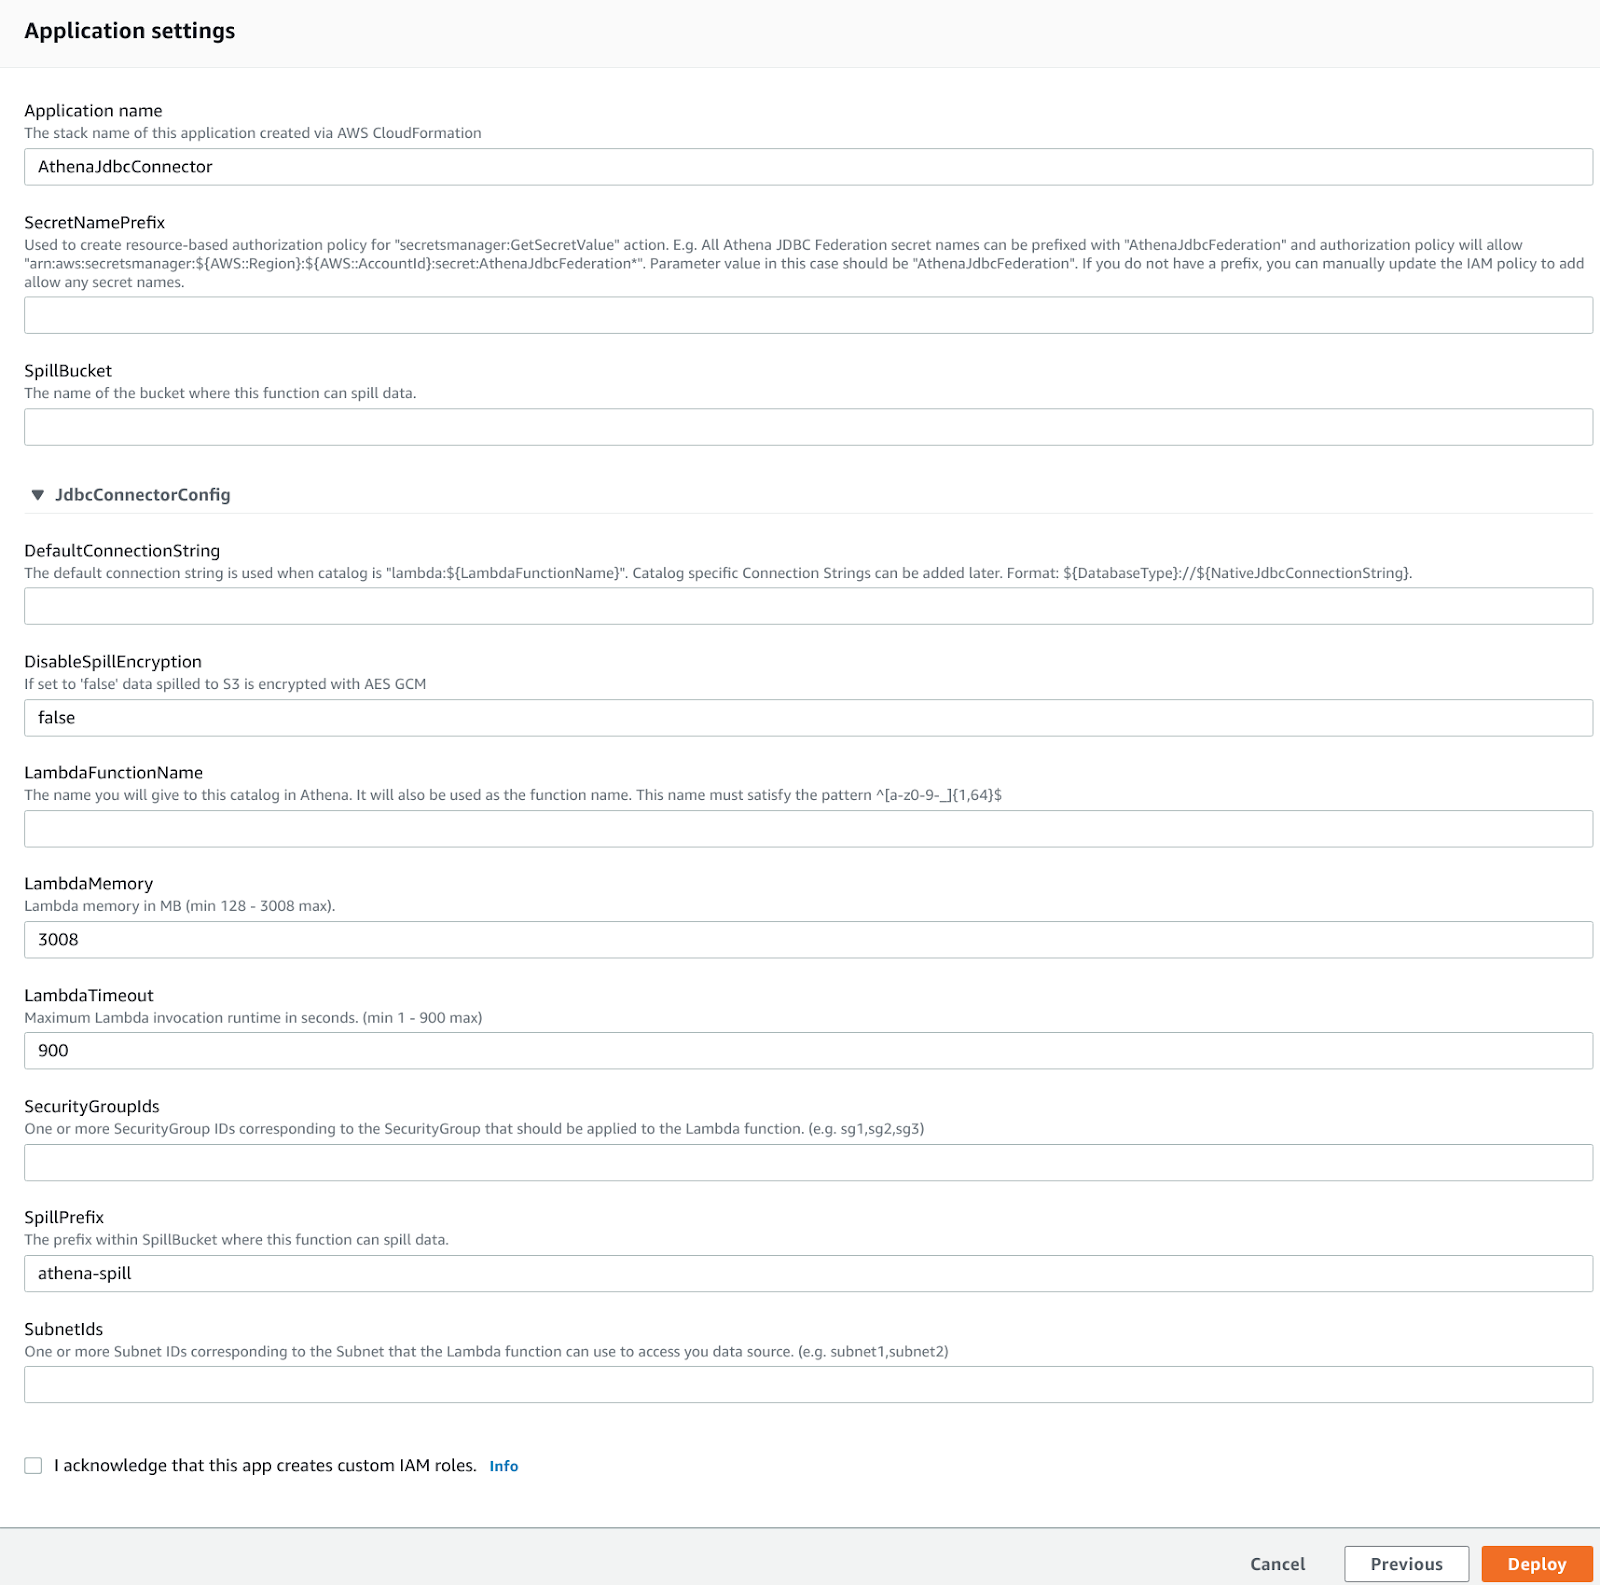
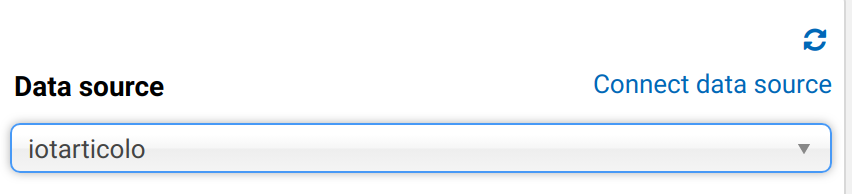
Secret Name prefix is used to store the DB creds in AWS Secret Manager. This is essential for a production environment. Leaving it blank means no integration will be created. After you select deploy and the Lambda you just created in the Amazon Athena dashboard you’ll see a new catalog different from the standard AwsGlueCatalog:
Note that at first, Databases and tables won’t appear. Fear not: If you go to the lambda functions you’ll see failures and in Amazon Cloudwatch you’ll see an error like:
Catalog is not supported in multiplexer. After registering the catalog in Athena, must set 'iotarticolo_connection_string' environment variable in Lambda. See JDBC connector README for further details.: java.lang.RuntimeException
Go on and set the required Lambda function env variable by using the same JDBC connection string used as DefaultConnection string in the preceding step. After this, the connection will work and you’ll be able to query your DB directly from Amazon Athena! Sweet!

However, at a closer look we immediately notice that something is afoul with the data: here is a screen of what we can read directly from MySQL:

As you can see, Amazon Athena was smart enough to convert tinyint(1) data to bool but could not fetch mysql datetime columns. This is due to a very well-known problem with jdbc connector and the easier fix is to just create a new field where the datetime is a string in Java datetime format:
UPDATE coffees SET coffees.coffee_hour_str=DATE_FORMAT(coffee_hour, '%Y-%m-%d %H:%i:%s');
ALTER TABLE coffees ADD COLUMN coffee_hour_str VARCHAR(255) AFTER coffee_hour;
At this point, Amazon Athena will be able to read the new field.
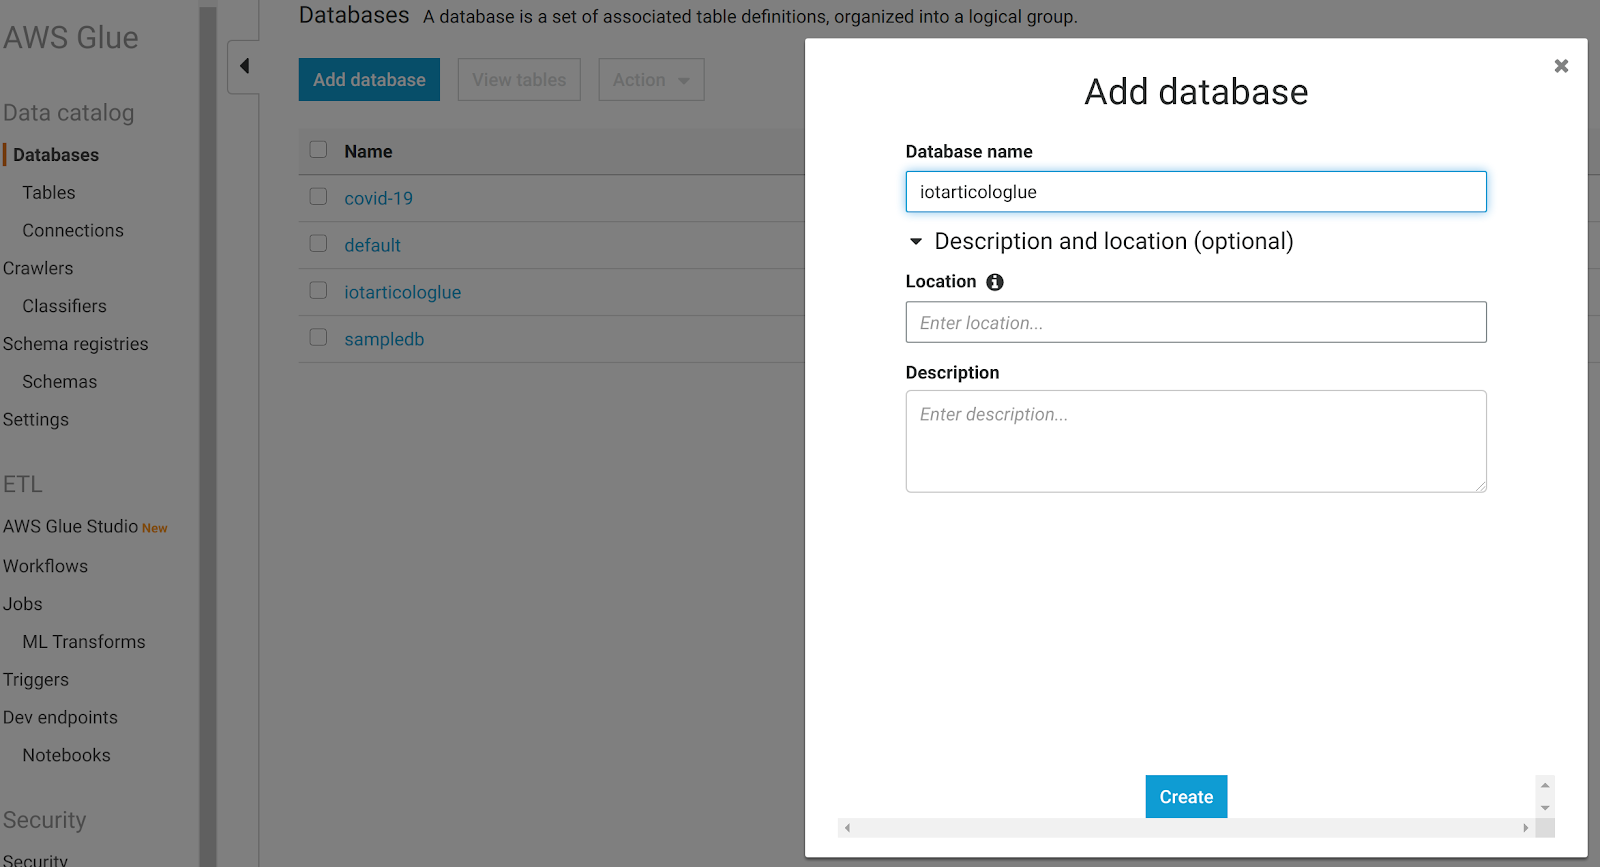
And now we are ready for a beautiful trick: let’s just go to the AWS Glue dashboard and create a new Database. A database is just a logical container for metadate. You can choose the name you prefer:
At this point we can go back to Amazon Athena and run a query like this:
CREATE table iotarticologlue.coffees
WITH (
  format='PARQUET', external_location='s3://besharp-athena/coffees_parquet', parquet_compression='GZIP'
) AS SELECT photo_url,smile,beard,mustache,glasses,coffee_hour_str FROM "iotarticolo"."iot"."coffees"
WHERE photo_url LIKE 'https://%';

This will create a new Table in the Database we just added to our AWS Glue data catalog and save all the data in Amazon S3 as a GZIP Parquet file. Furthermore, you could also change the compression (e.g. Snappy or BZIP) if you like.
The query will also filter out the date with a bad Amazon S3 url in photo_url!
So we now have a super-fast way to export our DB to Amazon S3 as parquet while automatically creating the AWS Glue catalog (the query does also that for free under the hood).
And now it is trivial to visualize this new catalog in AWS Glue databrew: go to dashboard and create a new project:

now create a new dataset in the add dataset section:
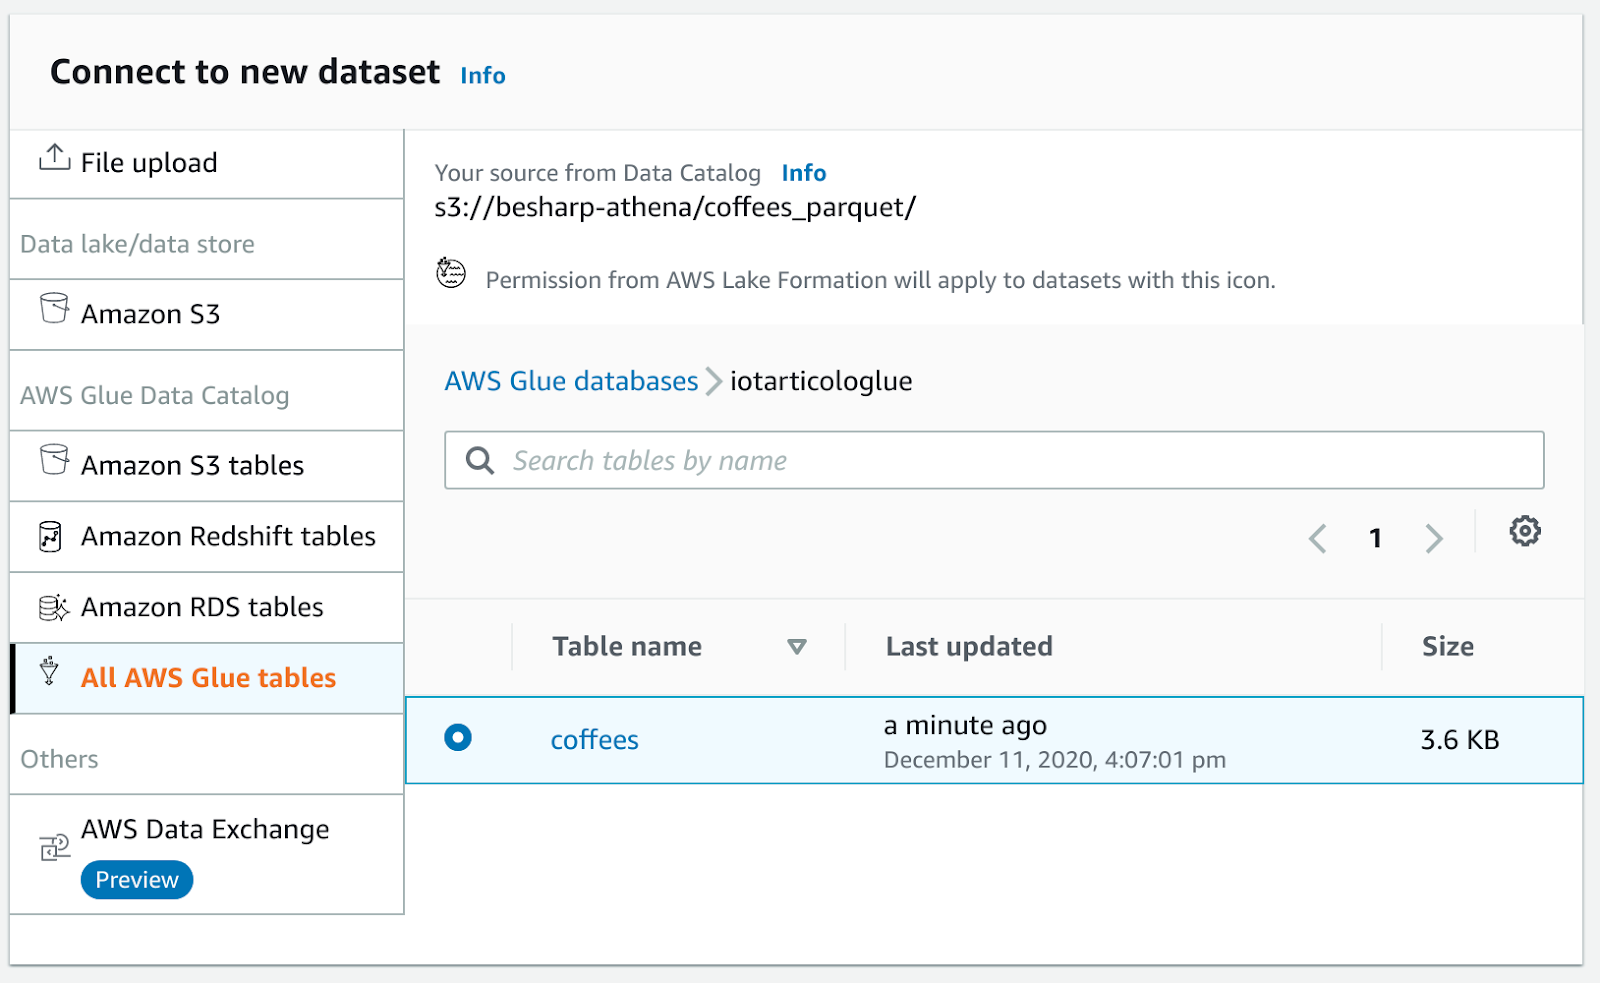
And create the project!
If you encounter an error try to set the object name to parquet in Amazon S3 and crawl again the table with AWS Glue crawlers (Databrew is pretty new too!)
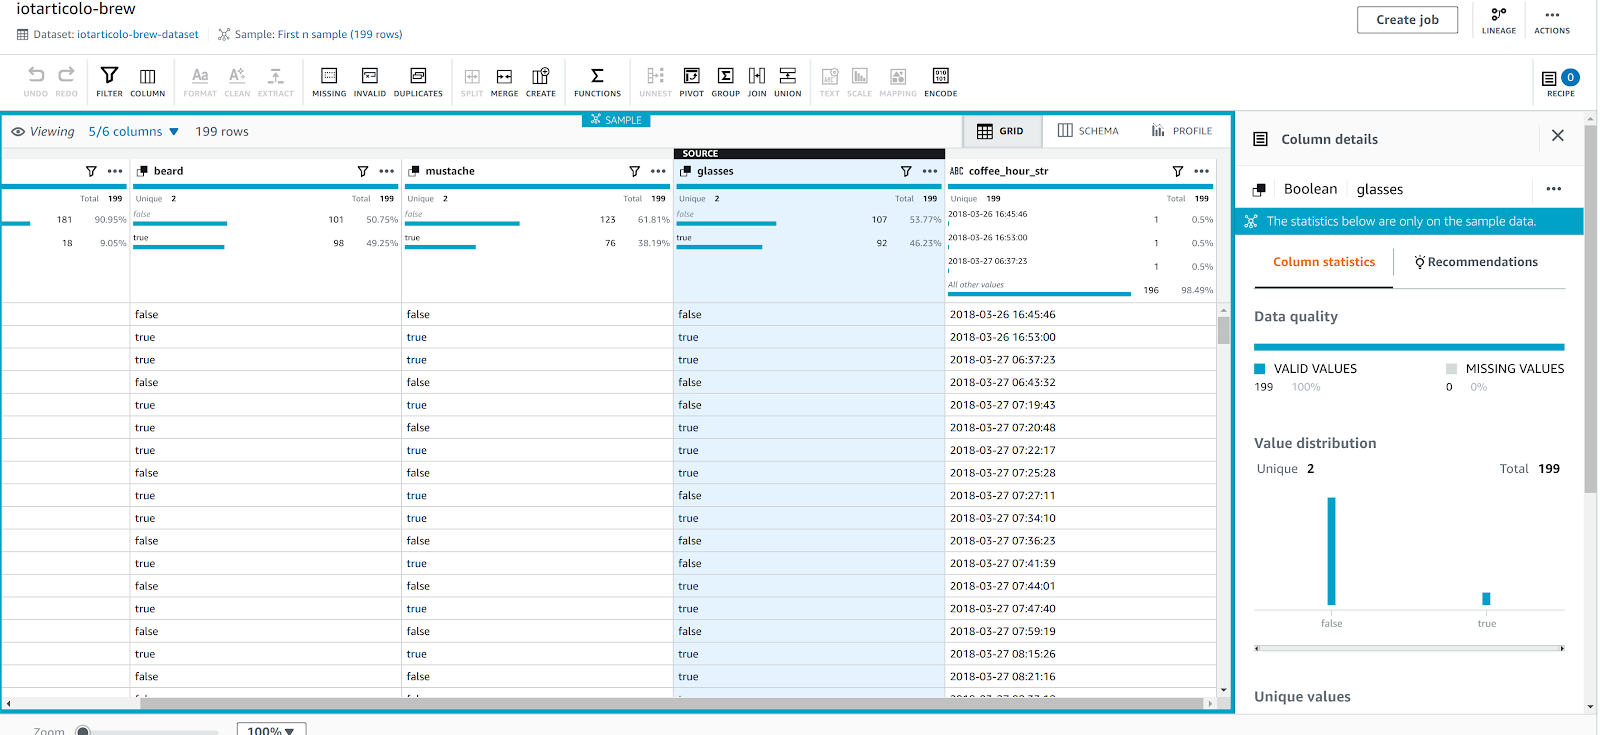
And voilà a beautiful data visualization of our dataset complete with column statistics!
In this article, we described a very simple IoT application using Amazon Rekognition and Amazon Aurora. We explained how it can be enhanced with Amazon Kinesis firehose and finally, we used Amazon Athena to transform and clean the collected data and save them very easily to parquet to be analyzed with AWS Glue Databrew, Amazon Athena, and other AWS tools such as EMR.
Have you ever tried something similar for your Data Analysis process?
Feel free to write to us about your solutions: we’ll be glad to offer you a “connected” coffee :D
That’s all for today.
Keep reading and see you in 14 days on #Proud2beCloud!