

Enabling enterprise Telemetry on AWS: Handling massive data backfills using ECS and Databricks wi...
17 June 2026 - 1 min. read
Keidi Xhafa
 In the last decade, the way we deal with and manage information dramatically changed due to two main reasons: on the one hand, the cost of data storage is becoming lower and lower, mainly due to the broad adoption and spread of public cloud services; on the other, thanks to the ubiquitous use of ERPs, CRMs, IoT platforms, and other monitoring and profiling software, a huge amount of data has become available to companies, both about their internal processes and about customer preferences and behaviors. So, basically, we have the opportunity to deal with more and more data, with an always increasing data quality, at a fraction of the cost.The availability of these big datasets to be analyzed and mined for information sparked a new interest in Artificial Intelligence and particularly Machine Learning (ML), which can be used to extract a predictive model from an existing dataset.The rise of internet integrated devices (IoT) dramatically increased the rate at which data are created and stored and the availability of these data, combined with new ML techniques, in turn, gives rise to a plethora of novel possibilities which would have been unthinkable just a few years ago. For example it is now possible to know how customers are using the products, which mistakes or unintended operations they are doing, which parts of a device wear out first in a real-world situation, which components of an industrial machine are more likely to fail given usage time and sensor readings (predictive maintenance), understand automatically if a produced part is good or faulty based only on the images of the given component and on a huge collections of images of good and faulty components.The ability to correctly extract, interpret and leverage the information contained in the collected data is thus a huge added value and a competitive advantage for the companies who undertake the often significant effort to develop it. Cloud providers, such as Amazon Web Services AWS, nowadays offers a wide range of Machine Learning centered services in order to meet the most common use cases of customers. On AWS currently, these ML backed services are available:
 Even if we chose not to put the instance in our VPC, the Jupiter notebook can only be reached using a pre-assigned URL generated from our AWS credentials. Once we click on open Jupiter we are presented with a standard Jupyter interface:
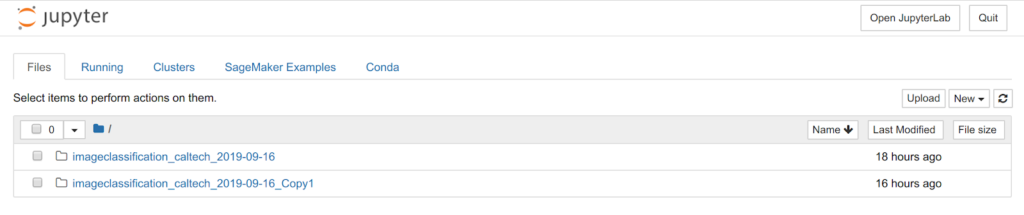 AWS provides a series of examples in order to help data scientists grow confident with SageMaker which can be found in the SageMaker Examples tab. In this article, we will follow the Image classification example using the Caltech 256 Dataset. In order to start, we can just click on Use Image-classification-fulltraining.ipynb
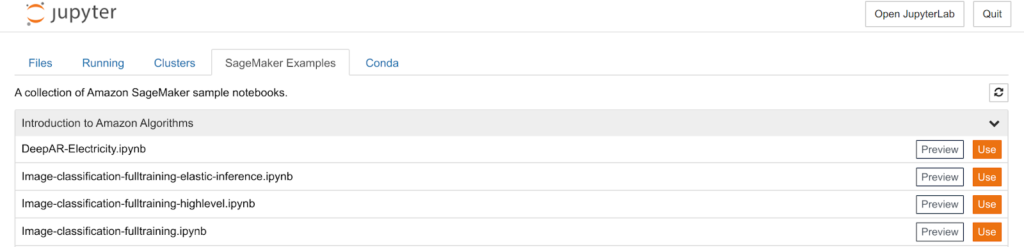 A normal Jupiter notebook is shown and we can follow the provided instructions.
 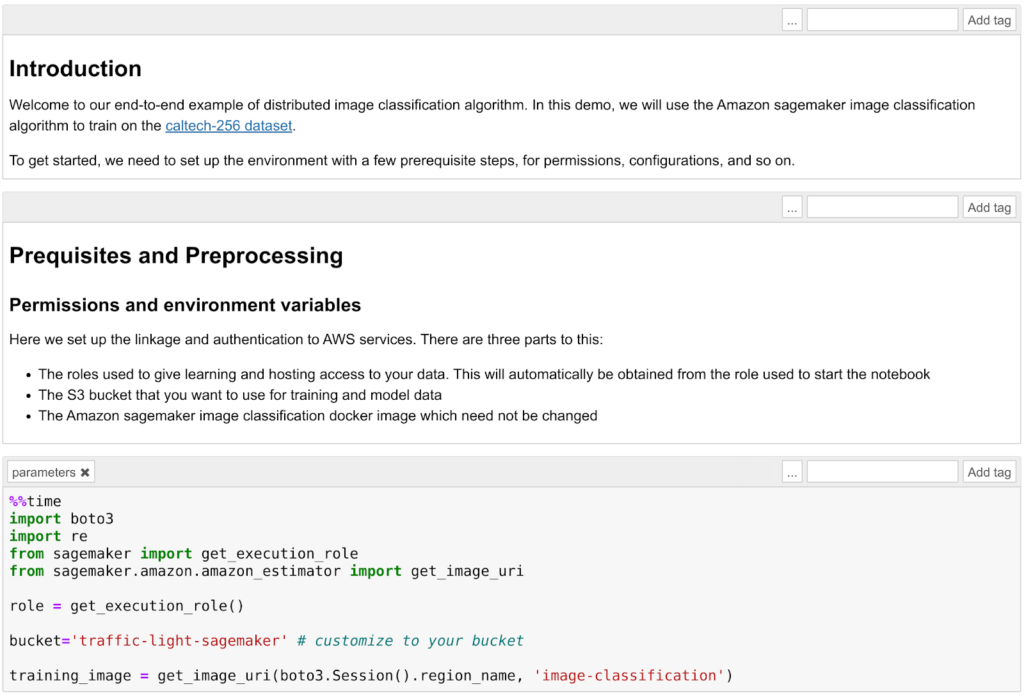 First of all, you need to create an S3 bucket and we should check that the role we assigned to the Notebook instance has the permission to read and write in that bucket. Running the template you'll then download the Caltech 256 dataset and prepare the training job of the image classification algorithm. The algorithm used in this example is the AWS Image Classification Algorithm which uses a convolutional neural network (ResNet). AWS provides a wide array of general algorithms already optimized for SageMaker (see AWS docs) however, it is also possible to deploy a custom model to be trained and packaged in a docker container.It is important to understand how to split the dataset into two parts: the first one for training and the second for the validation step. In this example each image class (ball, bathtub, Mars, riffle, etc) is divided into two sets: 60 images for training and the rest for validation.Before starting the training it is essential to choose sensible Hyperparameters: a wrong choice will result in non-performing algorithms. The choice of these parameters is often a trial and error process and for this particular application, the most relevant parameters are the learning rate and the epochs number.The learning rate is the length of the steepest descent algorithm vector: too high and you will overshoot the optimum, too low and the training will take forever. The epochs number is how many time the training dataset is passed forward and backward through the neural network: an epoch number which is too low will result in an underfitting of the data but also in a low training time while a too high epoch will result in an overfitting of data and very long training time. Both overfitting and underfitting are better to be avoided because the trained model will perform badly on validation data.
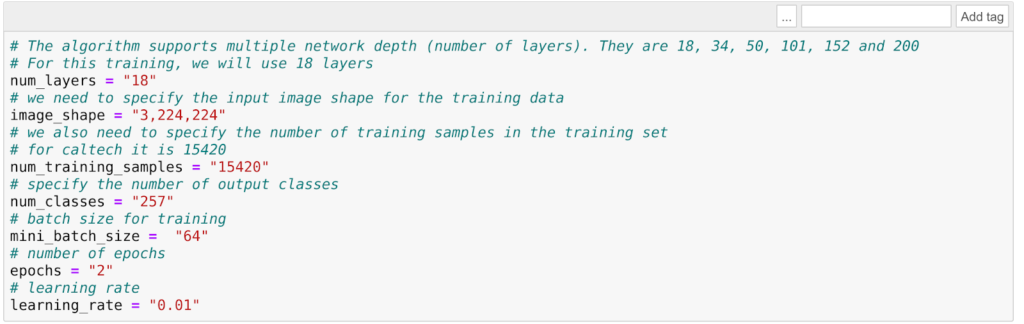 For example, using the default values provided by AWS in this example the training time is very low (just a few minutes) but the model will classify every image with something reddish and vaguely round in it as... Mars! (Not so precise :))
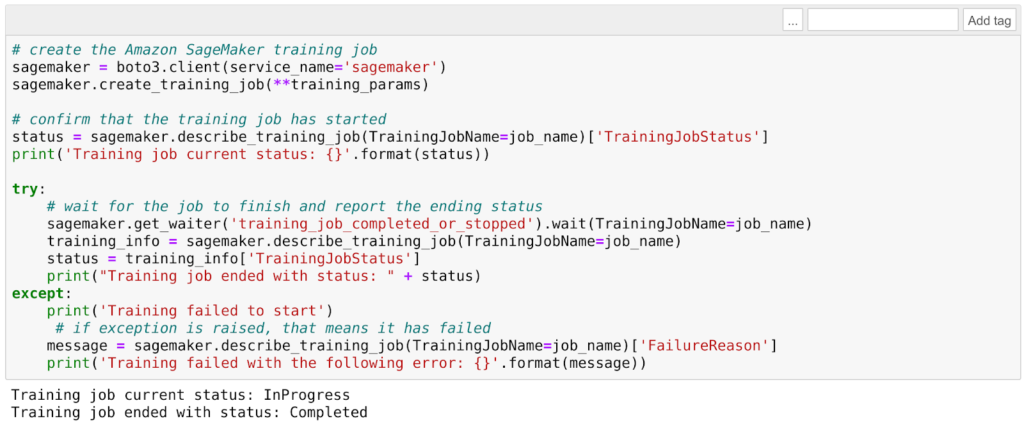 Once the training is complete it is time to deploy and test the trained model. First of all, we can create the model using the training result:
model_name="DEMO-full-image-classification-model" + time.strftime('-%Y-%m-%d-%H-%M-%S', time.gmtime())
print(model_name)
info = sage.describe_training_job(TrainingJobName=job_name)
model_data = info['ModelArtifacts']['S3ModelArtifacts']
print(model_data)

hosting_image = get_image_uri(boto3.Session().region_name, 'image-classification')

primary_container = {
    'Image': hosting_image,
    'ModelDataUrl': model_data,
}

create_model_response = sage.create_model(
    ModelName = model_name,
    ExecutionRoleArn = role,
    PrimaryContainer = primary_container)

print(create_model_response['ModelArn'])
After this, it is time to choose a part of the dataset to be used for the testing: in this example, bathtubs were chosen:batch_input = 's3://{}/image-classification-full-training/test/'.format(bucket)
test_images = '/tmp/images/008.bathtub'
!aws s3 cp $test_images $batch_input --recursive --quiet
Now we can create a batch job to feed all the test images to the model to be classified.timestamp = time.strftime('-%Y-%m-%d-%H-%M-%S', time.gmtime())
batch_job_name = "image-classification-model" + timestamp
request = \
{
"TransformJobName": batch_job_name,
"ModelName": model_name,
"MaxConcurrentTransforms": 16,
"MaxPayloadInMB": 6,
"BatchStrategy": "SingleRecord",
"TransformOutput": {
"S3OutputPath": 's3://{}/{}/output'.format(bucket, batch_job_name)
},
"TransformInput": {
"DataSource": {
"S3DataSource": {
"S3DataType": "S3Prefix",
"S3Uri": batch_input
}
},
"ContentType": "application/x-image",
"SplitType": "None",
"CompressionType": "None"
},
"TransformResources": {
"InstanceType": "ml.p2.xlarge",
"InstanceCount": 1
}
}
sagemaker = boto3.client('sagemaker')
sagemaker.create_transform_job(**request)
print("Created Transform job with name: ", batch_job_name)
while(True):
response = sagemaker.describe_transform_job(TransformJobName=batch_job_name)
status = response['TransformJobStatus']
if status == 'Completed':
print("Transform job ended with status: " + status)
break
if status == 'Failed':
message = response['FailureReason']
print('Transform failed with the following error: {}'.format(message))
raise Exception('Transform job failed')
time.sleep(30)
Creating a batch job will start an EC2 of the chosen type to classify the images. Once the process is finished we can check the results: if only two epochs were used while training very few images will be classified correctly.However, if we are satisfied with the result we can create an endpoint and thus deploy the model:from time import gmtime, strftime
job_name_prefix = "test"
timestamp = time.strftime('-%Y-%m-%d-%H-%M-%S', time.gmtime())
endpoint_config_name = job_name_prefix + '-epc-' + timestamp
endpoint_config_response = sage.create_endpoint_config(
EndpointConfigName = endpoint_config_name,
ProductionVariants=[{
'InstanceType':'ml.m4.xlarge',
'InitialInstanceCount':1,
'ModelName':model_name,
'VariantName':'AllTraffic'}])
timestamp = time.strftime('-%Y-%m-%d-%H-%M-%S', time.gmtime())
endpoint_name = job_name_prefix + '-ep-' + timestamp
print('Endpoint name: {}'.format(endpoint_name))
endpoint_params = {
'EndpointName': endpoint_name,
'EndpointConfigName': endpoint_config_name,
}
endpoint_response = sagemaker.create_endpoint(**endpoint_params)
Once the endpoint is created successfully we can send images to it through HTTP using the aws SDKs, for example using python boto3.The command is:runtime.invoke_endpoint(EndpointName=endpoint_name,
ContentType='application/x-image',
Body=payload)
where thepayloadis the image.This endpoint can thus be used both by an application deployed on AWS (e.g. Lambda functions, docker Microservices running on Fargate, applications deployed on EC2s) and also by applications running on-premise or even directly by clients.To conclude we presented a brief review of AWS Machine Learning services and in particular, we focused on how to deploy a simple ML application using SageMaker. If you are interested in this topic or have any questions contact us!