The serverless approach is becoming more and more popular in the development world. But how can we actually take advantage of it to create auto-scalable and resilient applications? That’s the point we are focusing on in this 3-article series explaining how to set up a serverless File Sharing platform.
In particular, in this article we’re setting up the infrastructure for our application, focusing on the best practices to follow for a correct and effective implementation. Moreover, as revealed in our first article, we are also realizing Continuous Integration and Continuous Delivery pipelines.
Let’s start with the application infrastructure.
As we aren’t analyzing code or other specific development subjects for now (a deep dive into them will be subject of our third article), we are going to use static pages and a lambda function to test the infrastructure we are about to create.
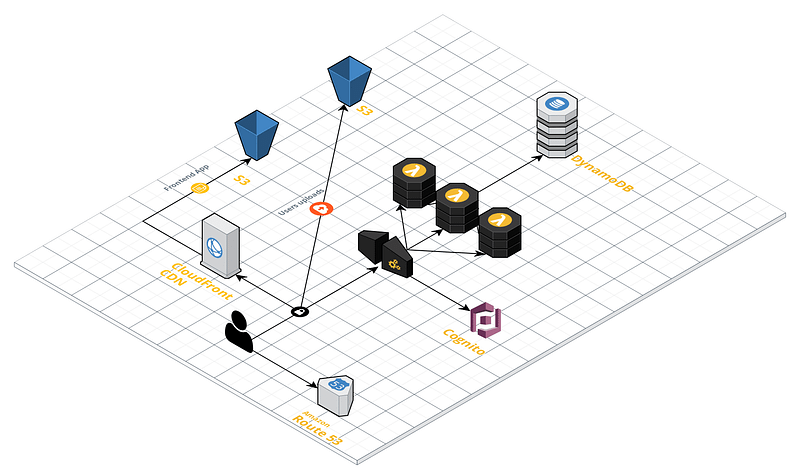
As shown in the graphic representation below, our future infrastructure will be composed by a front-end — a single page app deployed on Amazon S3 and served through CloudFront — and a back-end — a REST API built using API Gateway and Lambda.
To create the infrastructure for our serverless application, we first need to provide and set-up the following resources:
For the front-end
A private S3 bucket
A CloudFront distribution with permissions attached allowing it to access the private S3 bucket
For the back-end
A lambda function to test the integration
A Cognito User Pool
A private S3 bucket for user’s uploads
A DynamoDB table
An API (made with AWS API Gateway)
Front-end setup
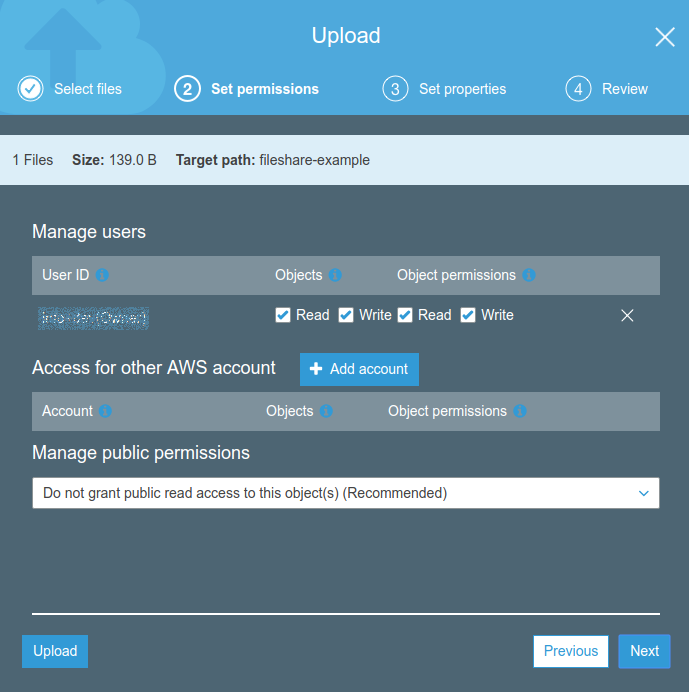
First of all, let’s create the S3 bucket we’ll upload the javascript and HTML application. Note that this bucket will also act as a source for CloudFront distribution. You can set it as “private” because we’ll configure the distribution so that CloudFront can access to it. We will learn how to do so later in this article.
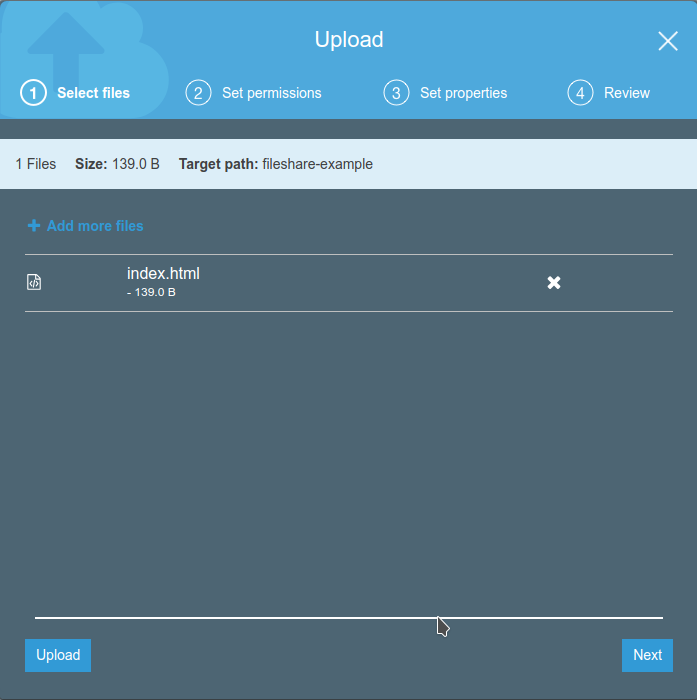
We now need to verify that the front-end works appropriately; let’s upload an example file.
<html>
      <head>
            <title>Esempio</title>
      </head>
      <body>
             <h1>It Works</h1>
             <hr/>
             <p>This is a simple test page</p>
      </body>
</html>
Name the file “index.html” and upload it to the just created S3 bucket.
Once the bucket is set up, we are ready to create the CloudFront distribution using it as a source. In this way, we will be able to distribute the file we’ve just uploaded (not yet accessible!).
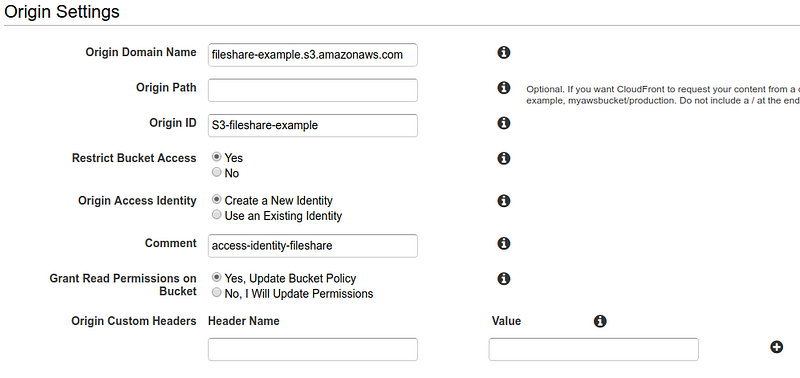
When configuring the CloudFront distribution, it is essential to enable the “Restrict Bucket Access” option to keep the bucket private.
Another important thing to do is to configure the “Origin Access Identity” option so that CloudFront can access the bucket created, even if it’s private. It is possible to delegate to the wizard both the creation of an Access Identity and the Bucket Policy update.
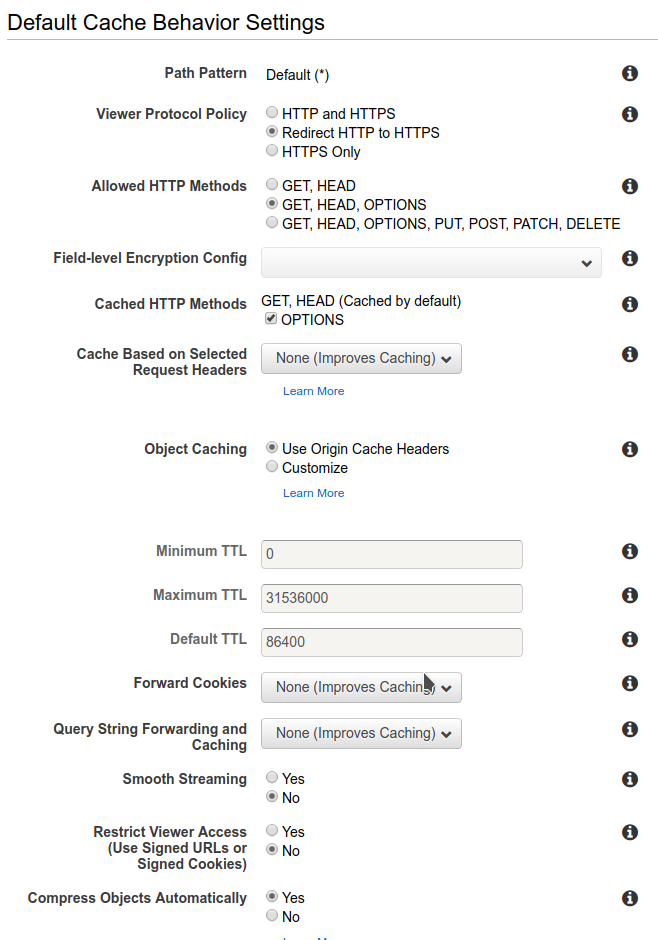
Regarding caching behavior, activate HTTP redirect to HTTPS and enable automatic compression of the delivered content. By doing so, you will be able to improve performances.
Don’t forget to set “index.html” as the default file to be served.
The distribution creation process is usually slow, so don’t panic if the process takes several minutes to complete. Note that even if the distribution has been launched, it is frequent to encounter access errors. Just don’t worry about that, they usually resolve in minutes (max. 1 hour): this kind of errors are due to the fact that DNS propagation usually takes time.
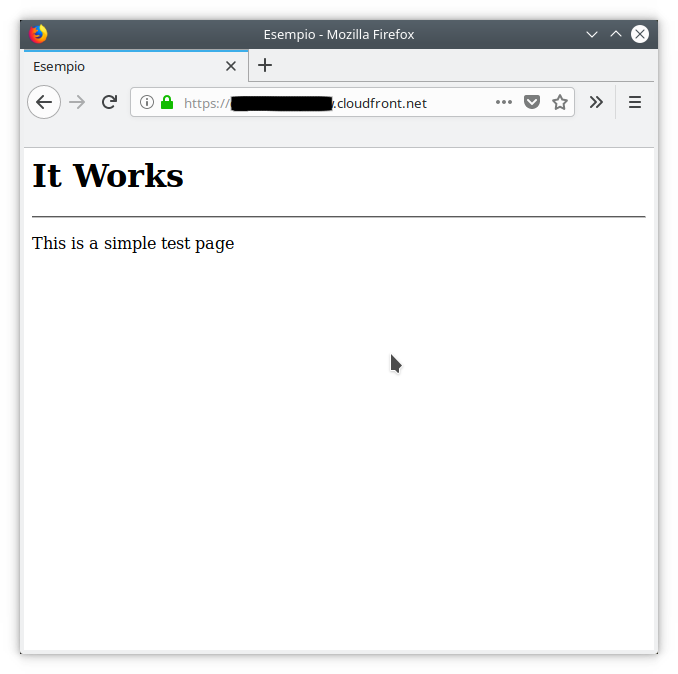
Once the distribution is ready, a public URL will be available. By using it, it will be possible to check the front-end is actually working. If everything has been properly configured, something similar to the picture below will be displayed:
We are at the end of the front-end setup.
The S3 bucket is served in the most efficient and cost-effective way through a CDN. To update the application, the only action required is to upload the new version to the S3 bucket.
Please note that if updating files already saved to the bucket, you won’t be able to see any change, unless you first invalidate the cache of the distribution created.
Back-end setup
Let’s go deeper into the infrastructure back-end setup and creation.
The first thing we need to do is creating a lambda function. It will come in handy for testing by returning a “success” status and a given message.
As already said, it is not the time to focus on the real application yet, we first need to create each part of the infrastructure. So, be patient till the next article :)
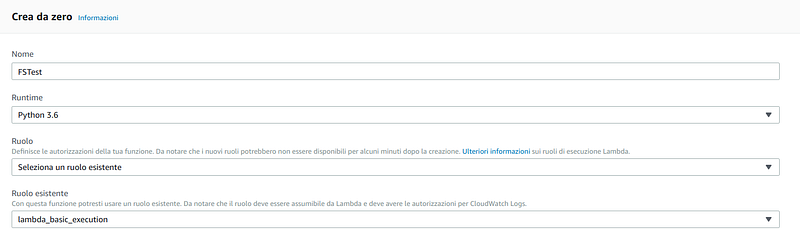
Let’s go on with lambda function creation. First of all, we need to set up Python as Runtime and to define a role with basic permissions.
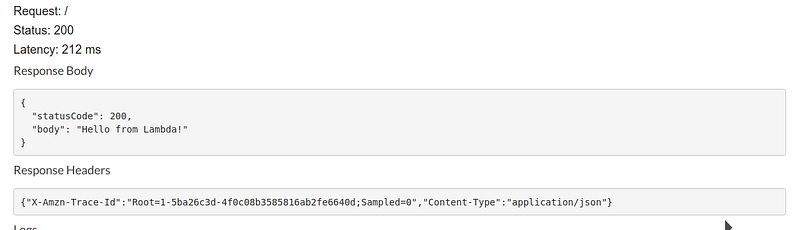
Here is an example of a function returning a message:
Let’s now test the function: the output coming out from a working function is similar to the example below:
The next step for us is to take care of the provisioning of the resources left.
Let’s create another S3 bucket. This will be the place where users’ files will be uploaded. Let’s create it in the same way we created the bucket needed for the front-end setup. Let’s keep it private, as above. Don’t forget to take note of the bucket name. We will need it later while configuring the application.
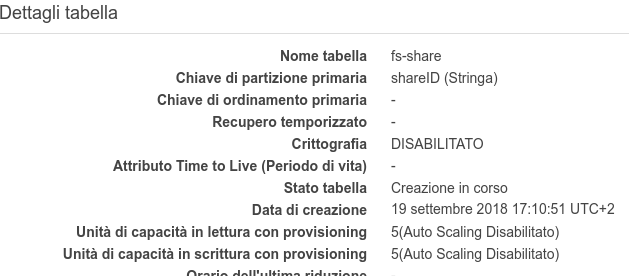
Create now a DynamoDB table. It will contain share metadata and information about the files. Keep all the default values during the table creation and specify “shareID” as the primary partition key.
It’s now time to set up Cognito to prepare the authentication.
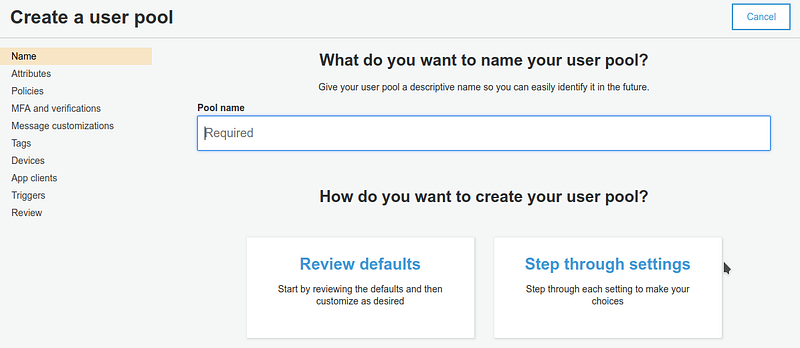
Let’s start creating and configuring a Cognito User Pool.
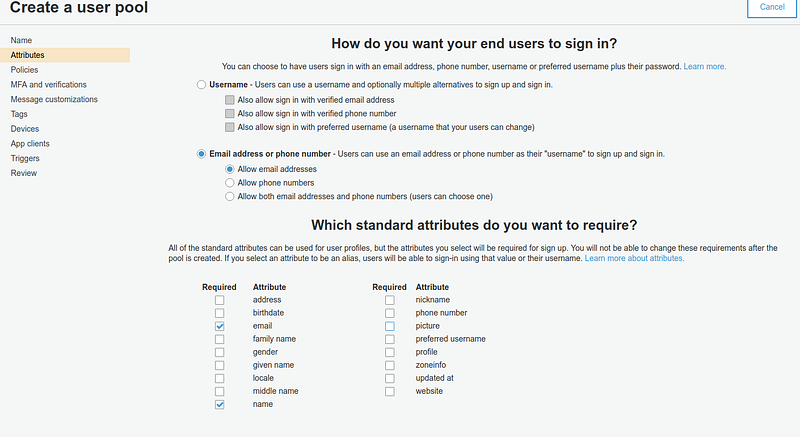
The wizard allows us to customize some useful behaviors; to get a working app, we need a Pool where users can sign in through an email. Email address will be verified through the Cognito secure code.
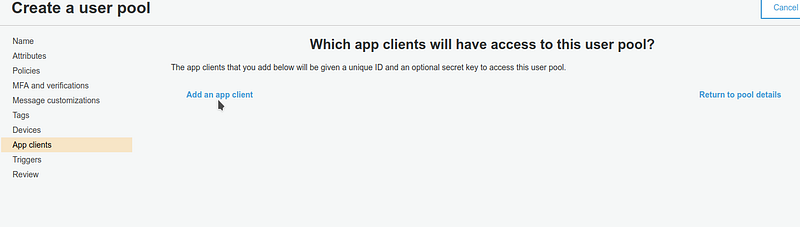
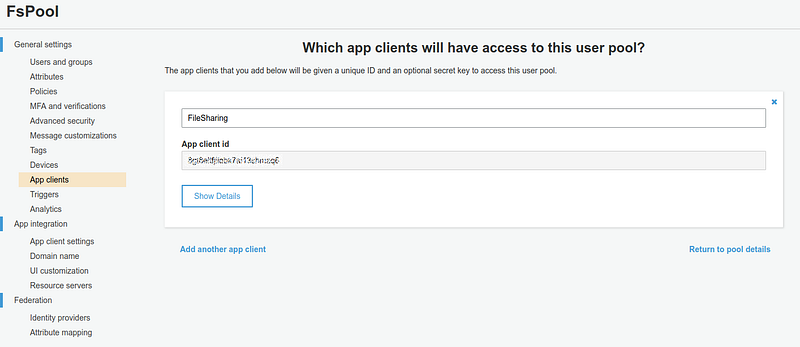
Last but not least: creating a client app. Remember to take note of its ID!
Name first the User Pool and launch the wizard
Configure then the authentication process and the profile fields.
It’s time to create the client app taking note of its ID. Note that we don’t need to generate secrets. This is not required when using Cognito through a web app.
Cognito is now correctly configured.
The last building block we need for our infrastructure setup is an API built through API Gateway. It allows the front-end to access to lambda back-end functionalities thanks to HTTPS requests.
It acts as an interface between user requests and the lambda function we created. Moreover, it automatically manages requests authentication making use of Cognito User Pool.
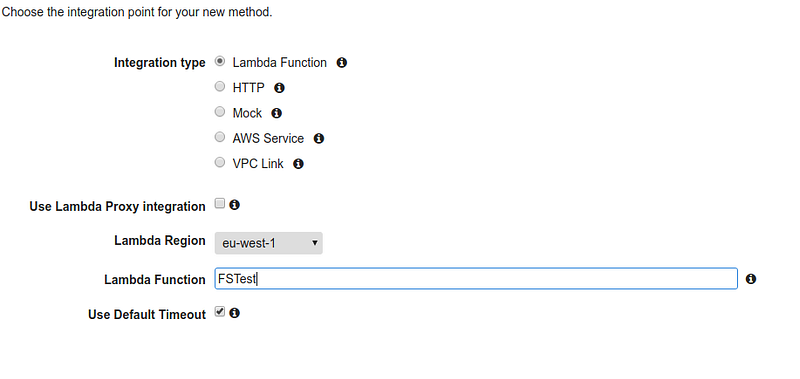
As we only need it for testing reasons, let’s create a simple API containing only a GET method triggering the lambda function.
The integration is completed and ready to be tested
In our next article, we are going to finally focus on the application and the CD/CI pipeline. We will learn how to integrate Cognito with API Gateway so that we can take advantage of the automatic authentication.
Head of software development at beSharp and Full-Stack Developer, I keep all our codebases up-to-date. I write code in almost any language, but Typescript is my favorite. I live for IT, Game design, Cinema, Comics, and... good food. Drawing is my passion!